Setup for data analysis
Last updated on
Now that we’re in Chapter 3, we’ll work on bigger and more complex data analysis projects. To get off to a good start, we’ll use the @nshiab/setup-data-project library to prepare our project folders, install libraries, and create the configuration files we need. This is how I start all of my projects.
Make sure you’ve completed the VS Code and Node.js setup. We’ll keep using the same editor and runtime.
Set up a project
When you start a new project, you need to create a few folders and configuration files. To avoid doing this manually every time, I created an open-source library called @nshiab/setup-data-project that we can run to do all of this automatically. We’ll use it for the data analysis lessons and projects from this chapter onward.
Create a new, empty folder somewhere handy on your computer and open it in VS Code.
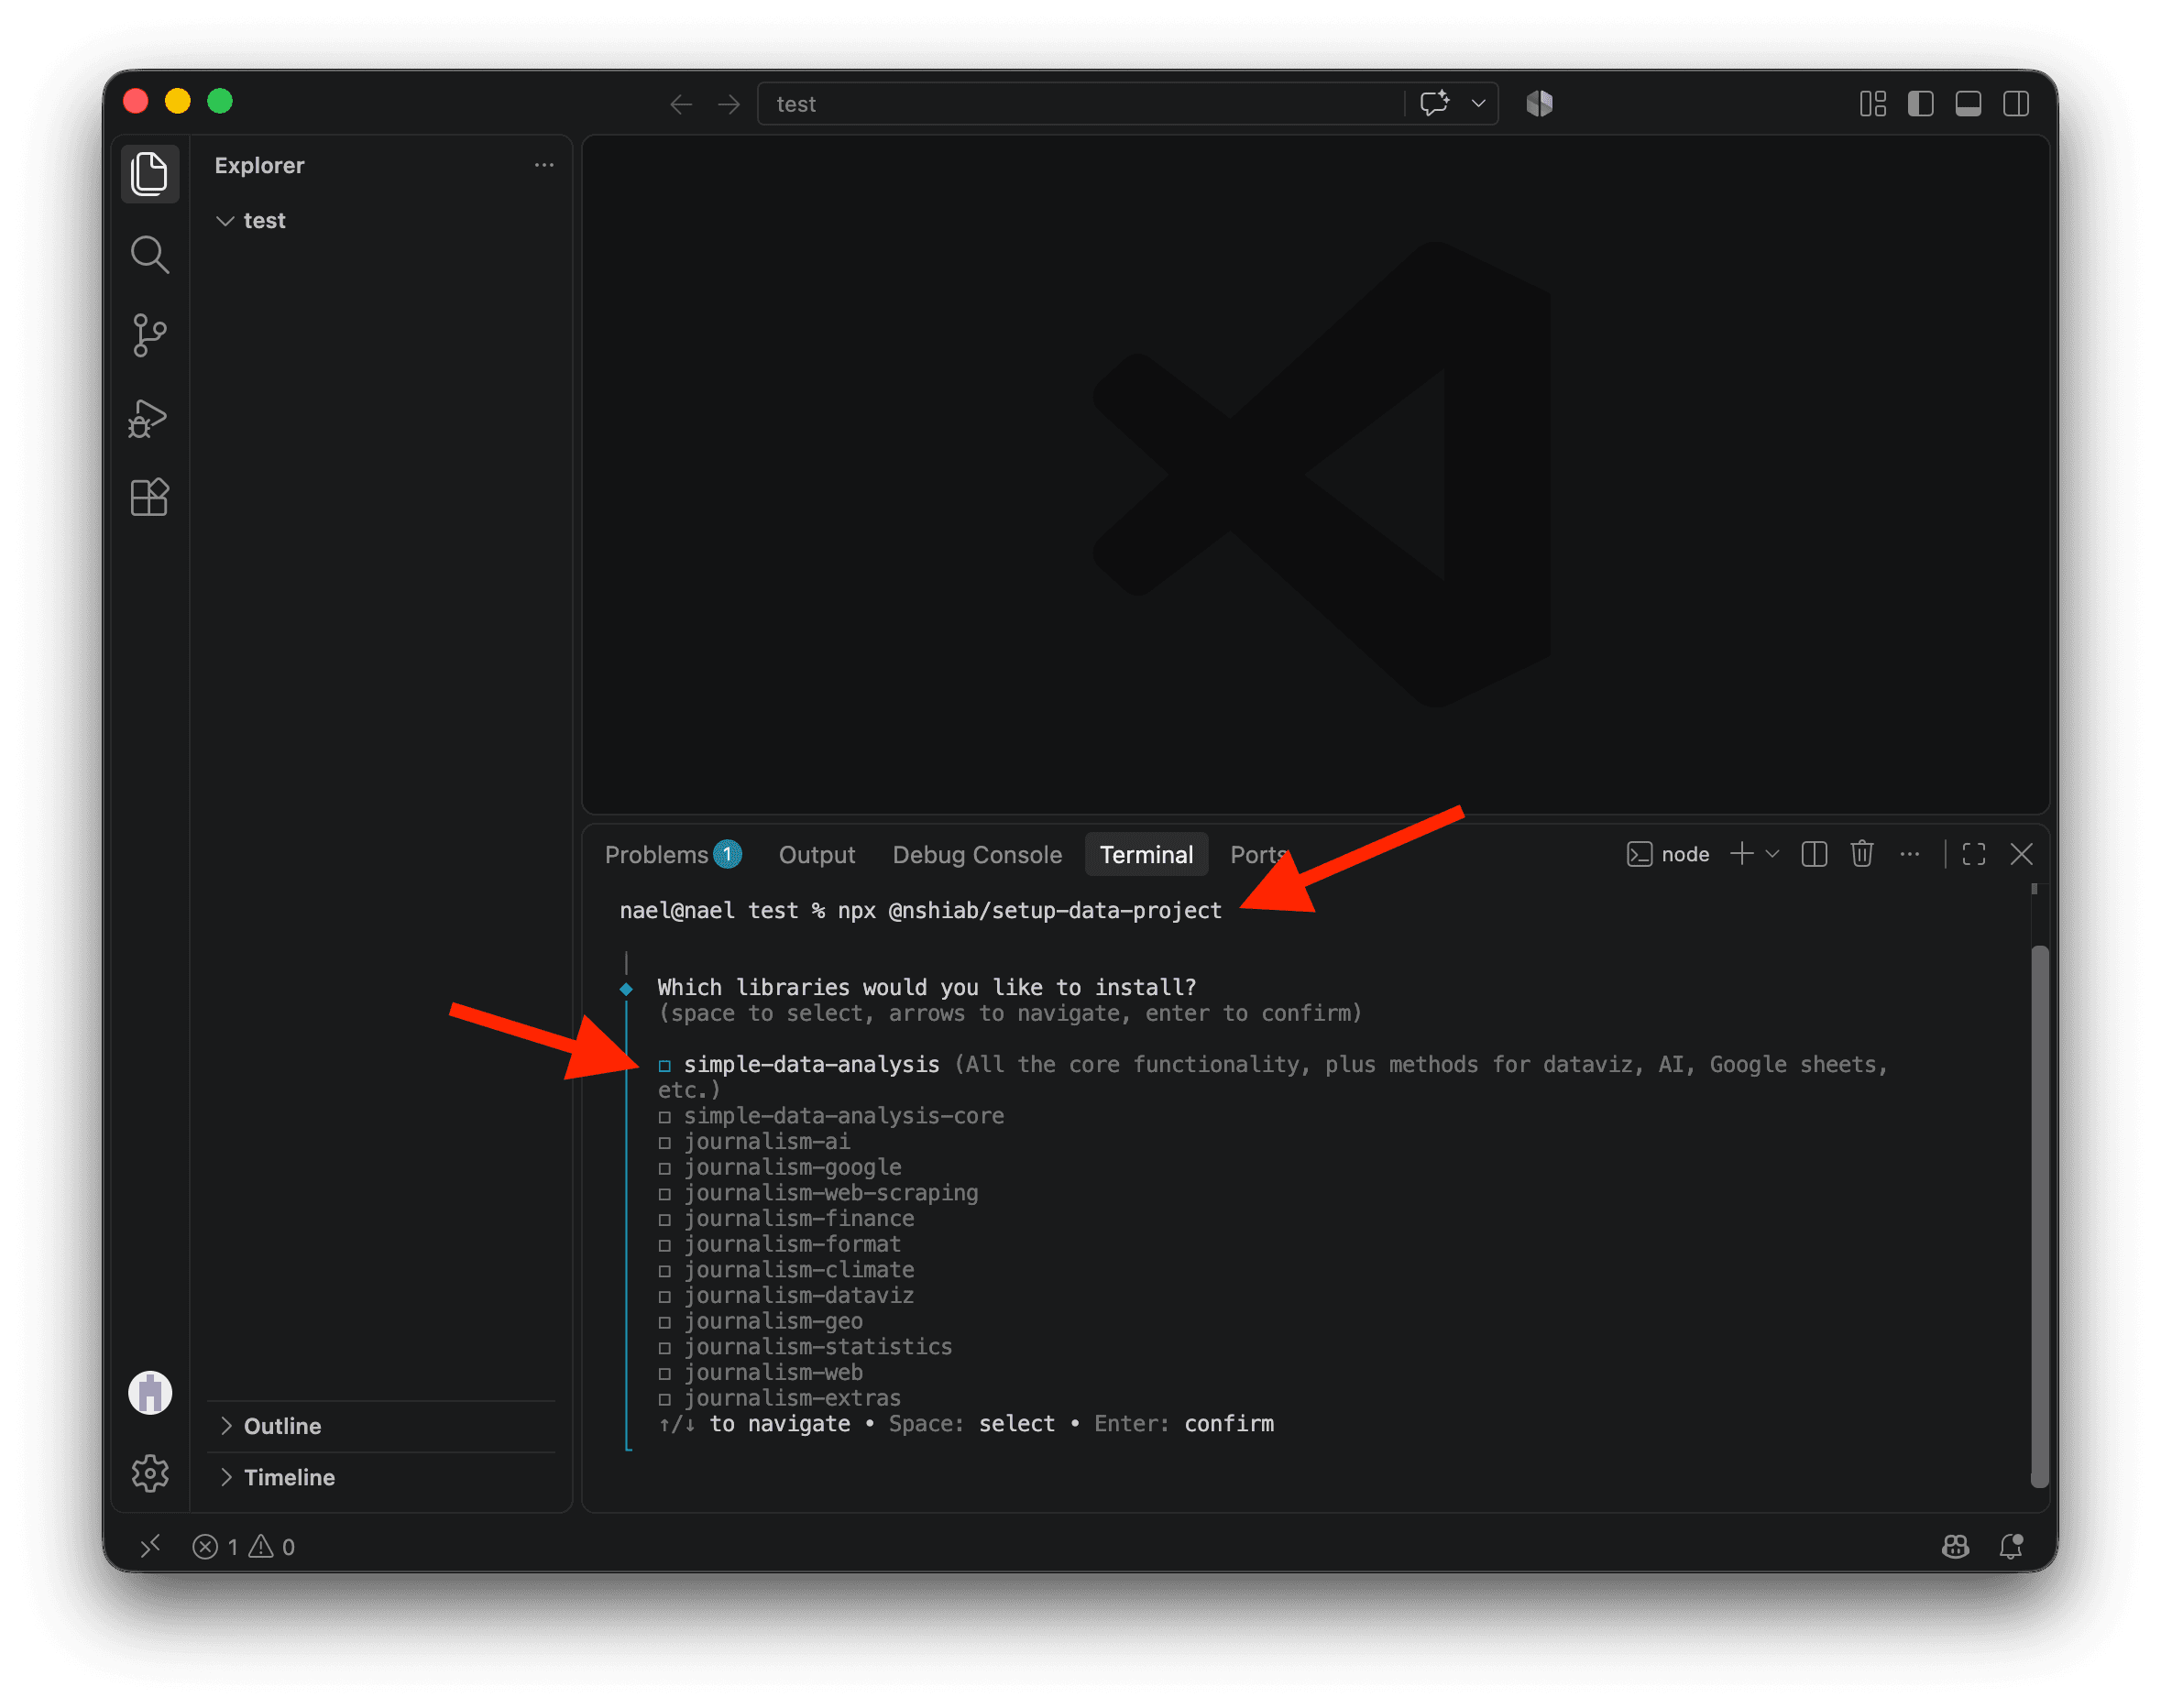
Then run the @nshiab/setup-data-project library in this folder by running this command in the terminal:
npx @nshiab/setup-data-projectnpx comes with Node.js. It downloads the library if needed and runs it to set up your project in the current folder. If you’re asked whether to install @nshiab/setup-data-project, type y and press Enter.
The @nshiab/setup-data-project library will ask which libraries you want to install. Use the space bar to select simple-data-analysis, then press Enter. This installs SDA and the tools we’ll need for data analysis.
Wait until setup finishes and displays You are all set!. It may take a few seconds to download and install the tools. You’ll see a main.ts file in the sda folder with basic code using the Simple Data Analysis (SDA) library . This is the library we’ll use in the next lessons in this chapter.
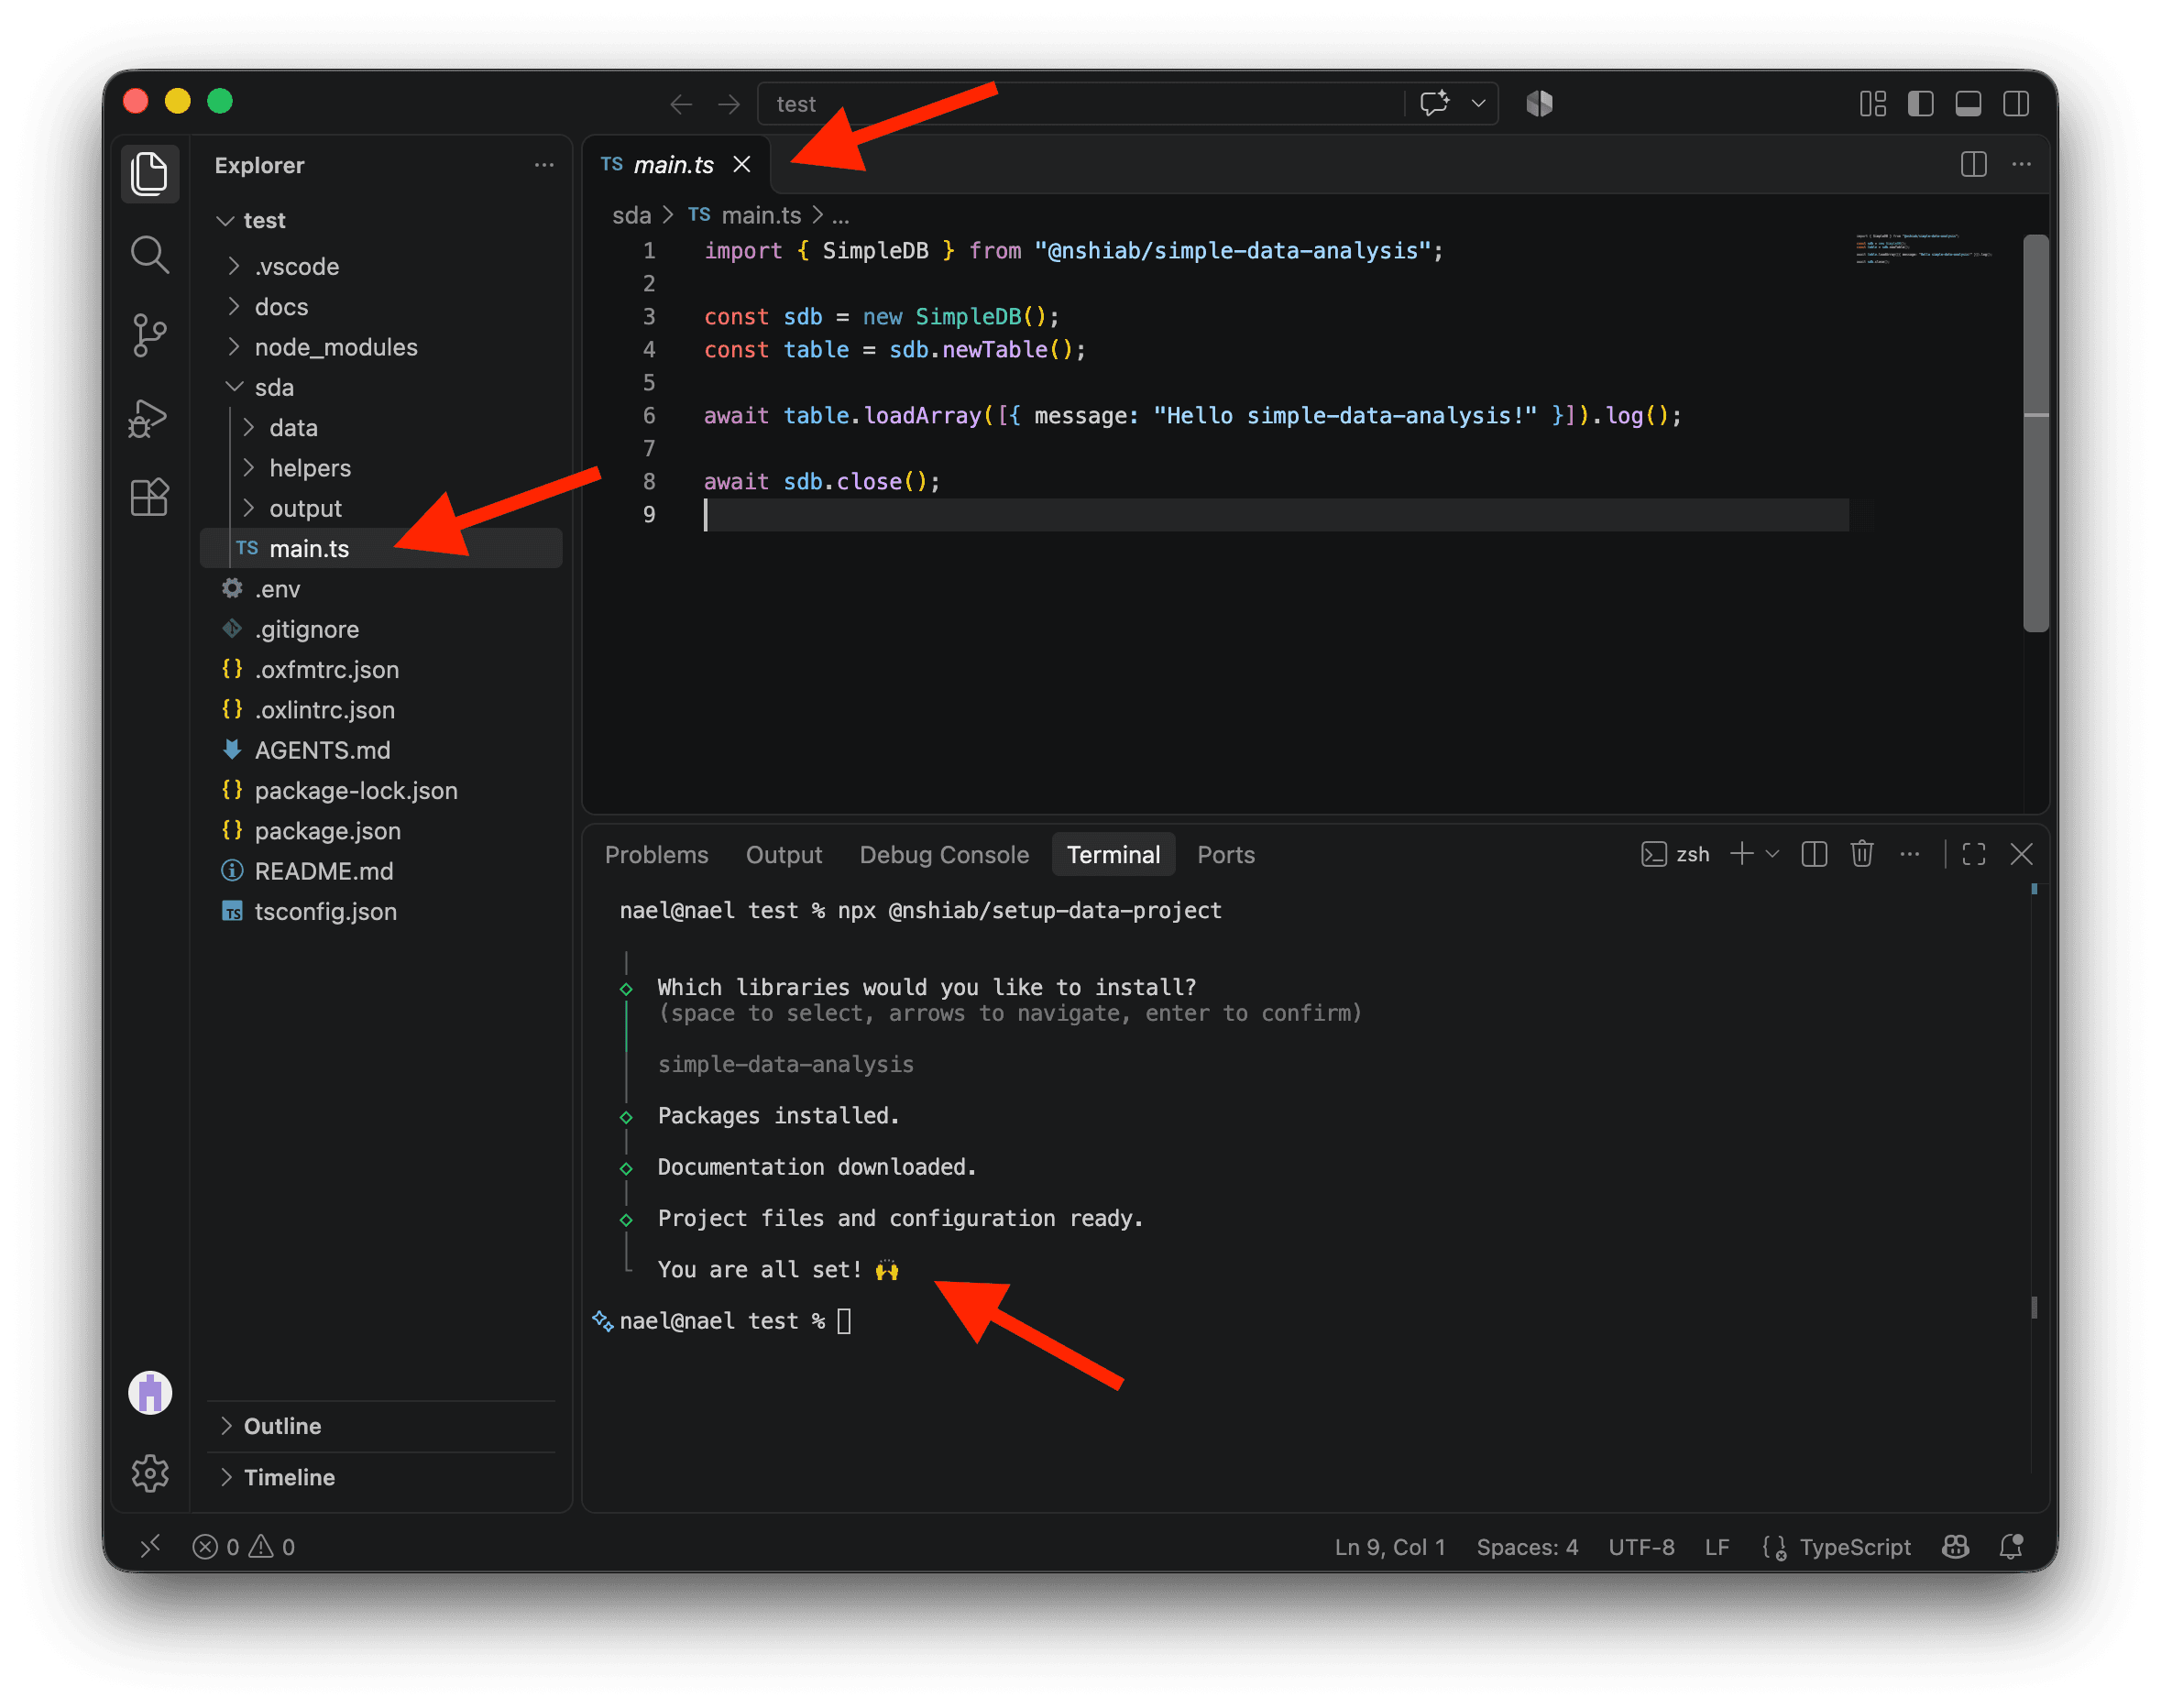
There’s no magic here: the setup tool just created files in your folder. Most are text files in different formats.
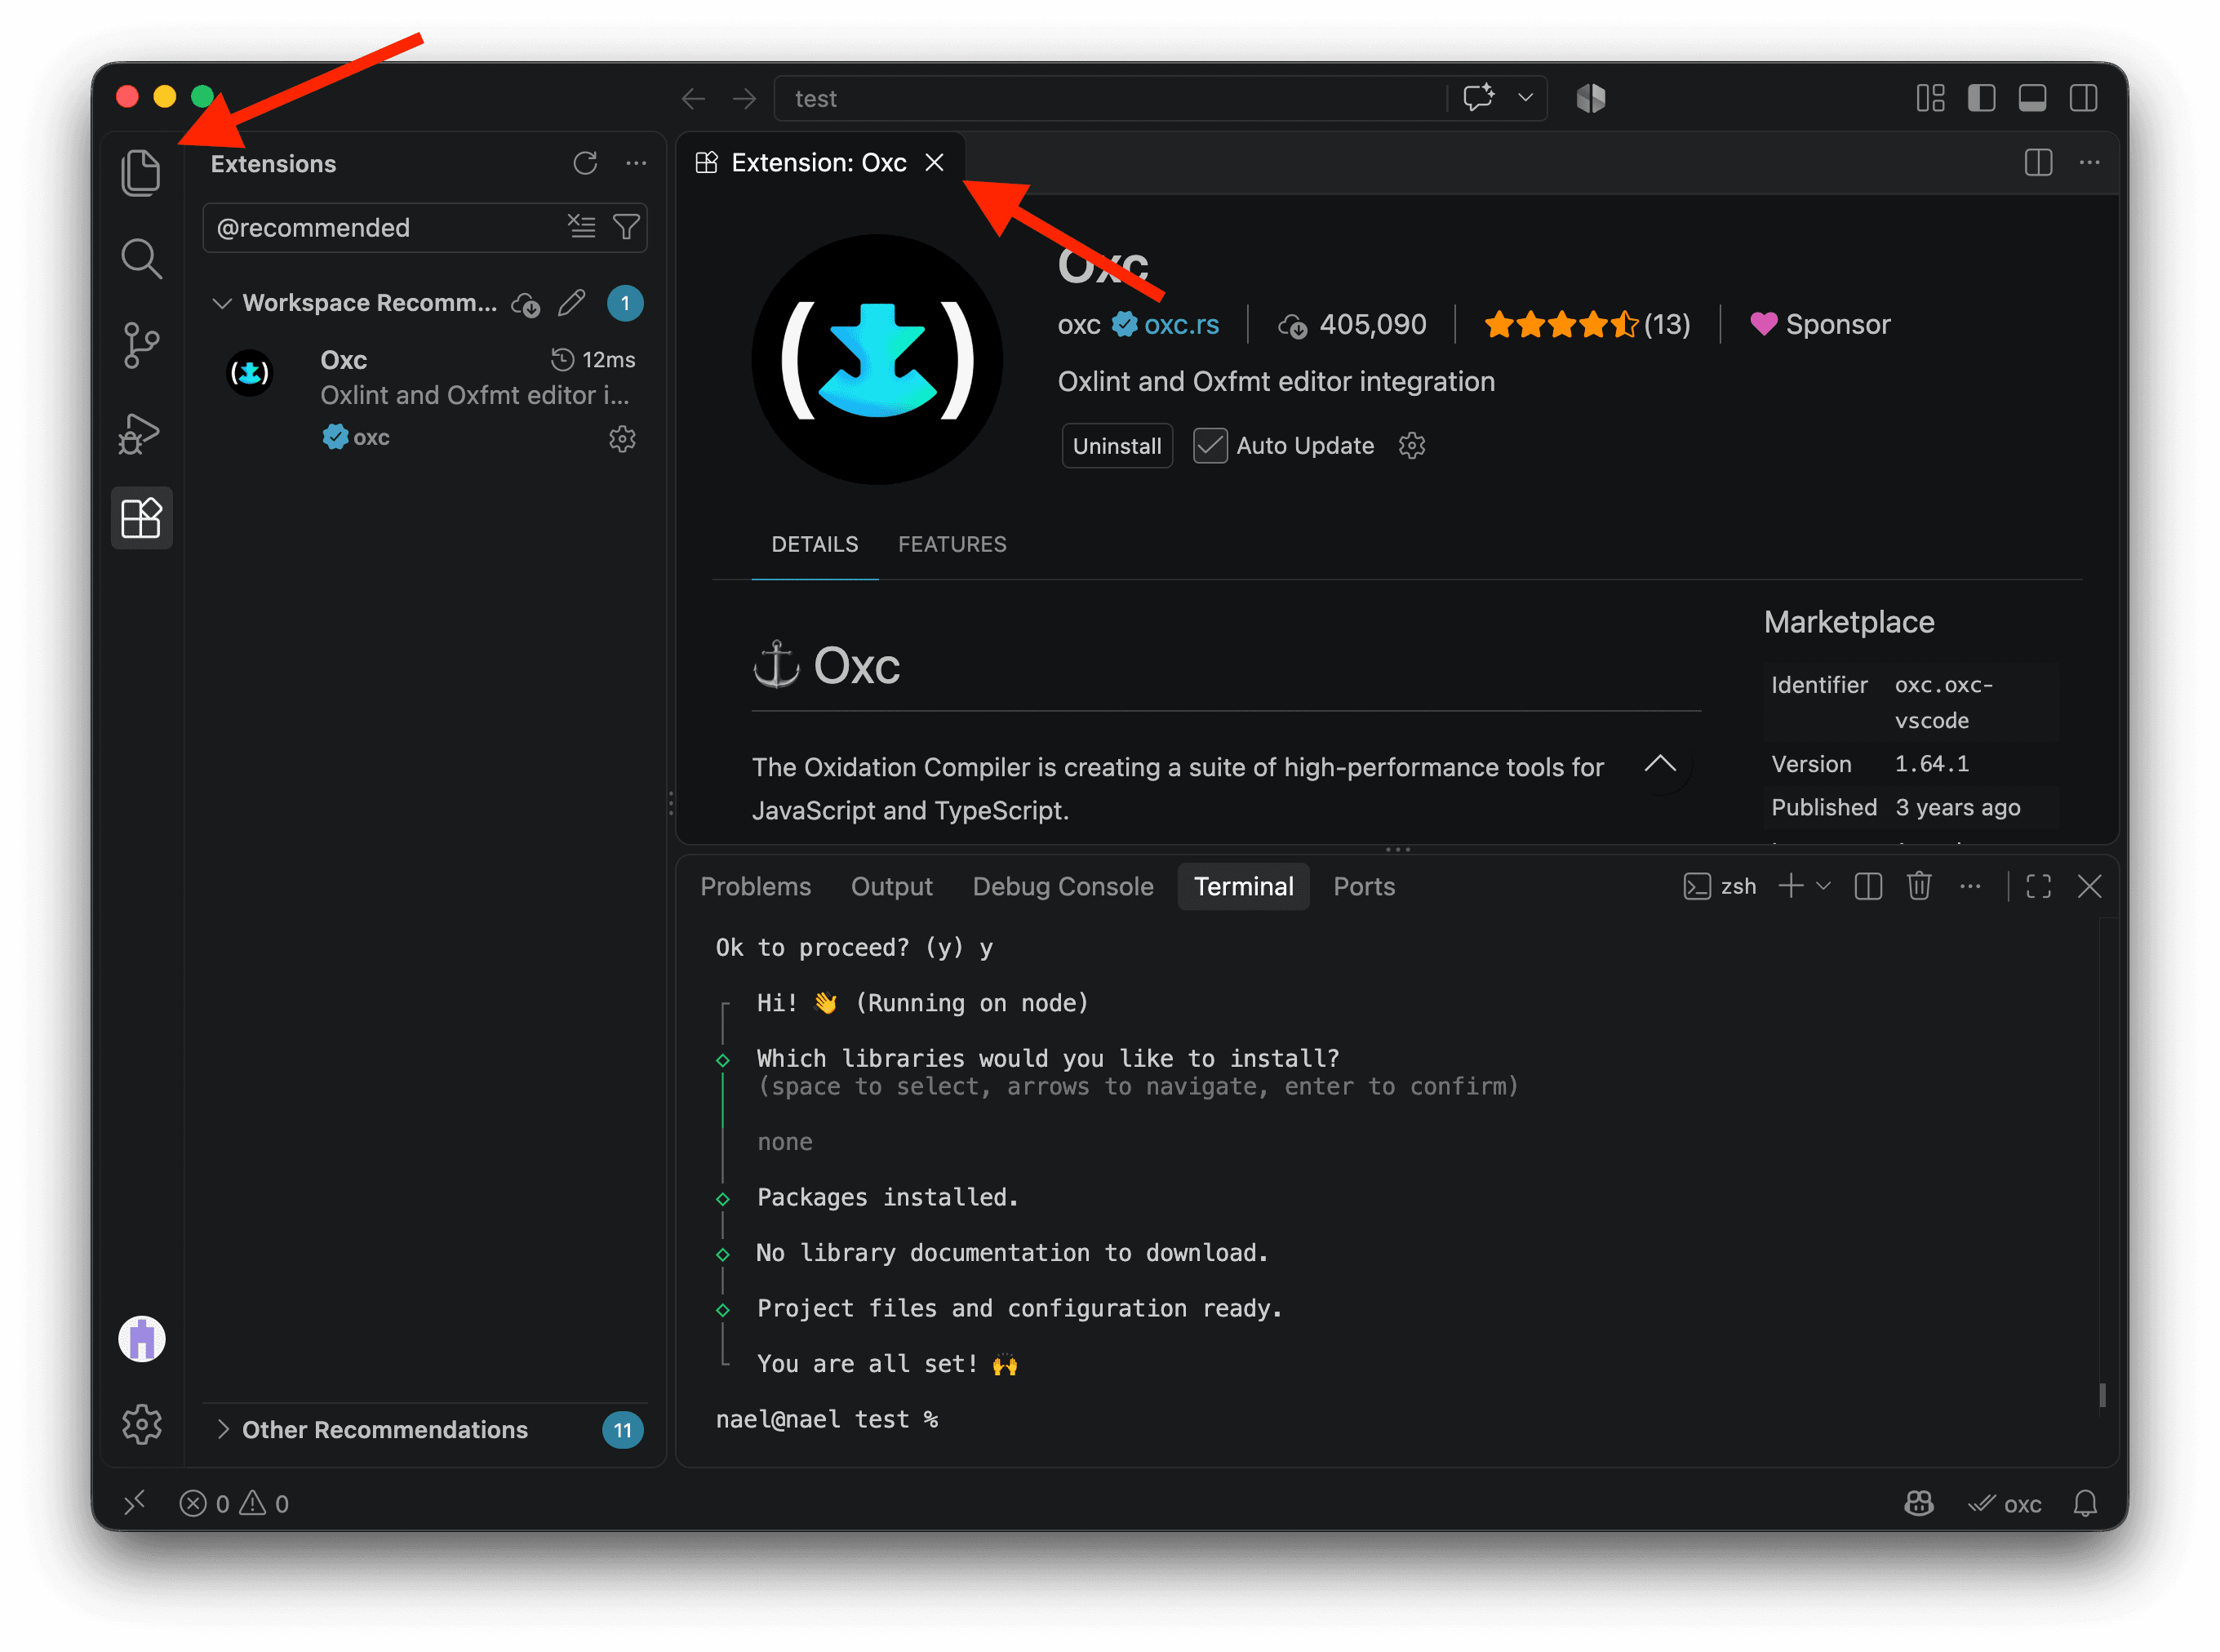
After a few seconds, you should see a pop-up recommending the Oxc extension. Click Install. This extension helps us format our code and spot potential bugs in the editor, alongside TypeScript’s type errors. This extension will also help us find these problems before the code runs.
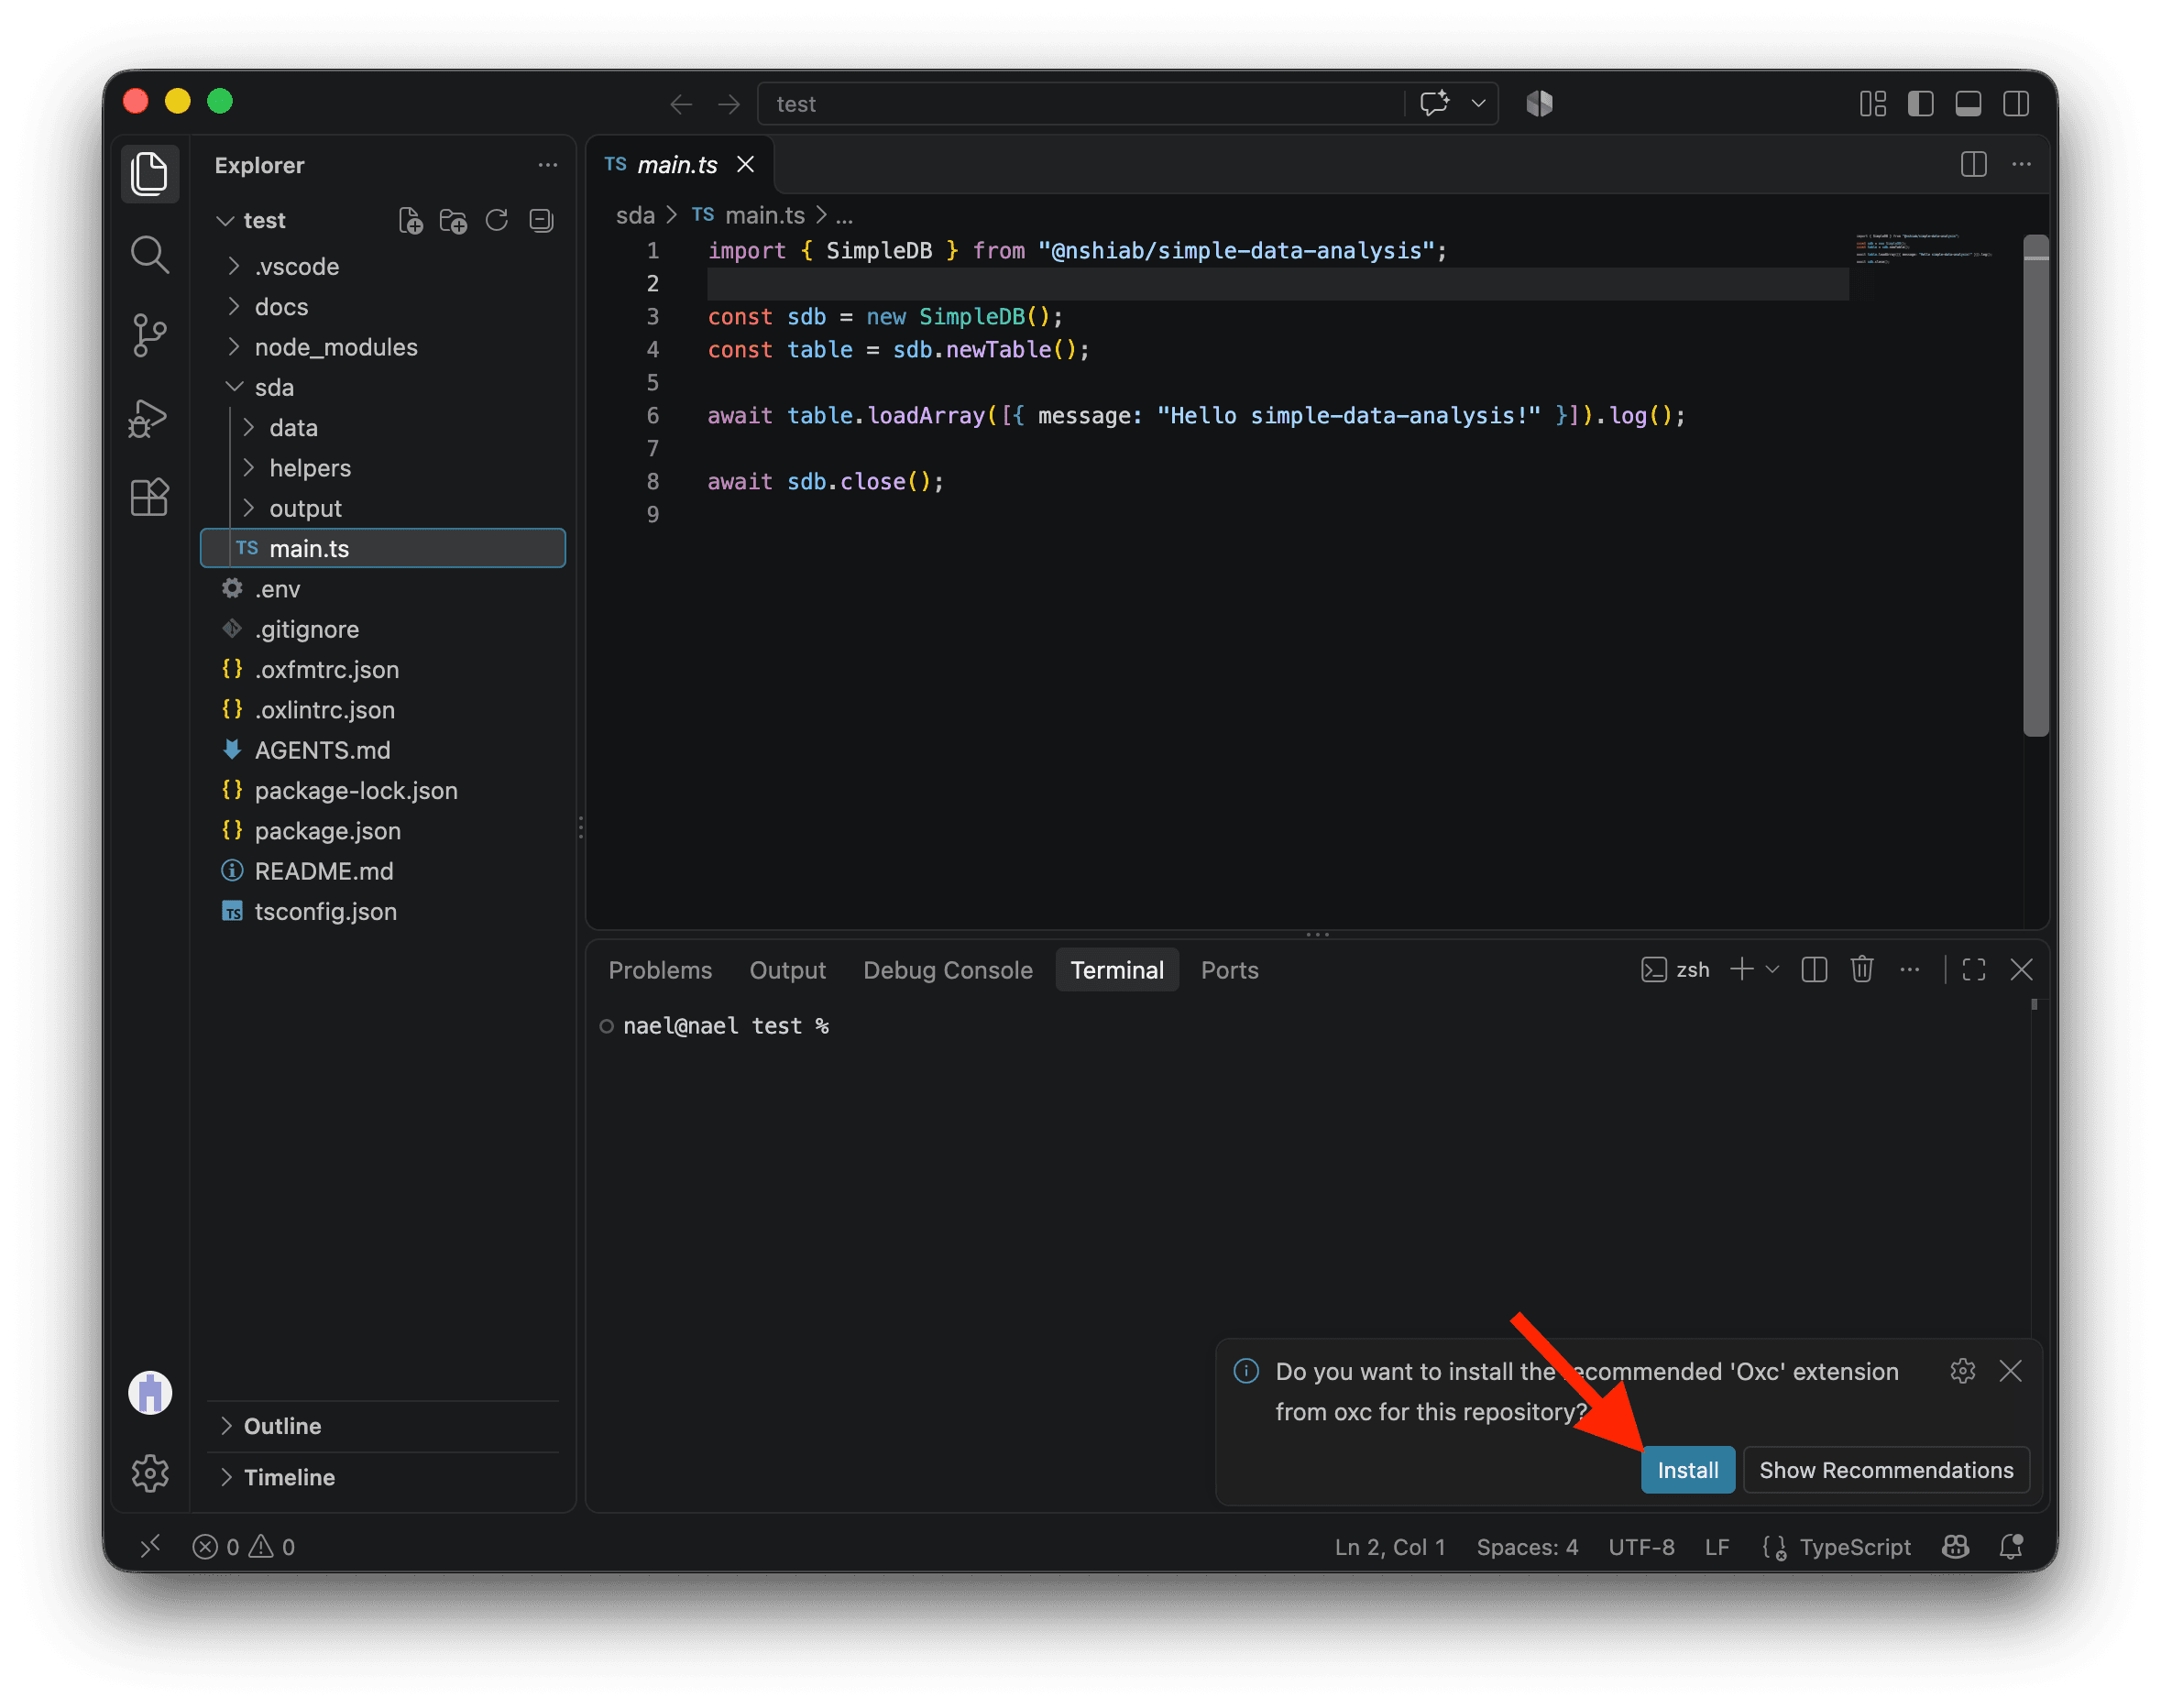
If you don’t see this pop-up, fully quit VS Code. On Mac, press Command + Q, or right-click its icon in the Dock and choose Quit; clicking the red close button only closes the window. On Windows, use File => Exit. Then reopen VS Code and your project folder. The pop-up should appear after a few seconds.
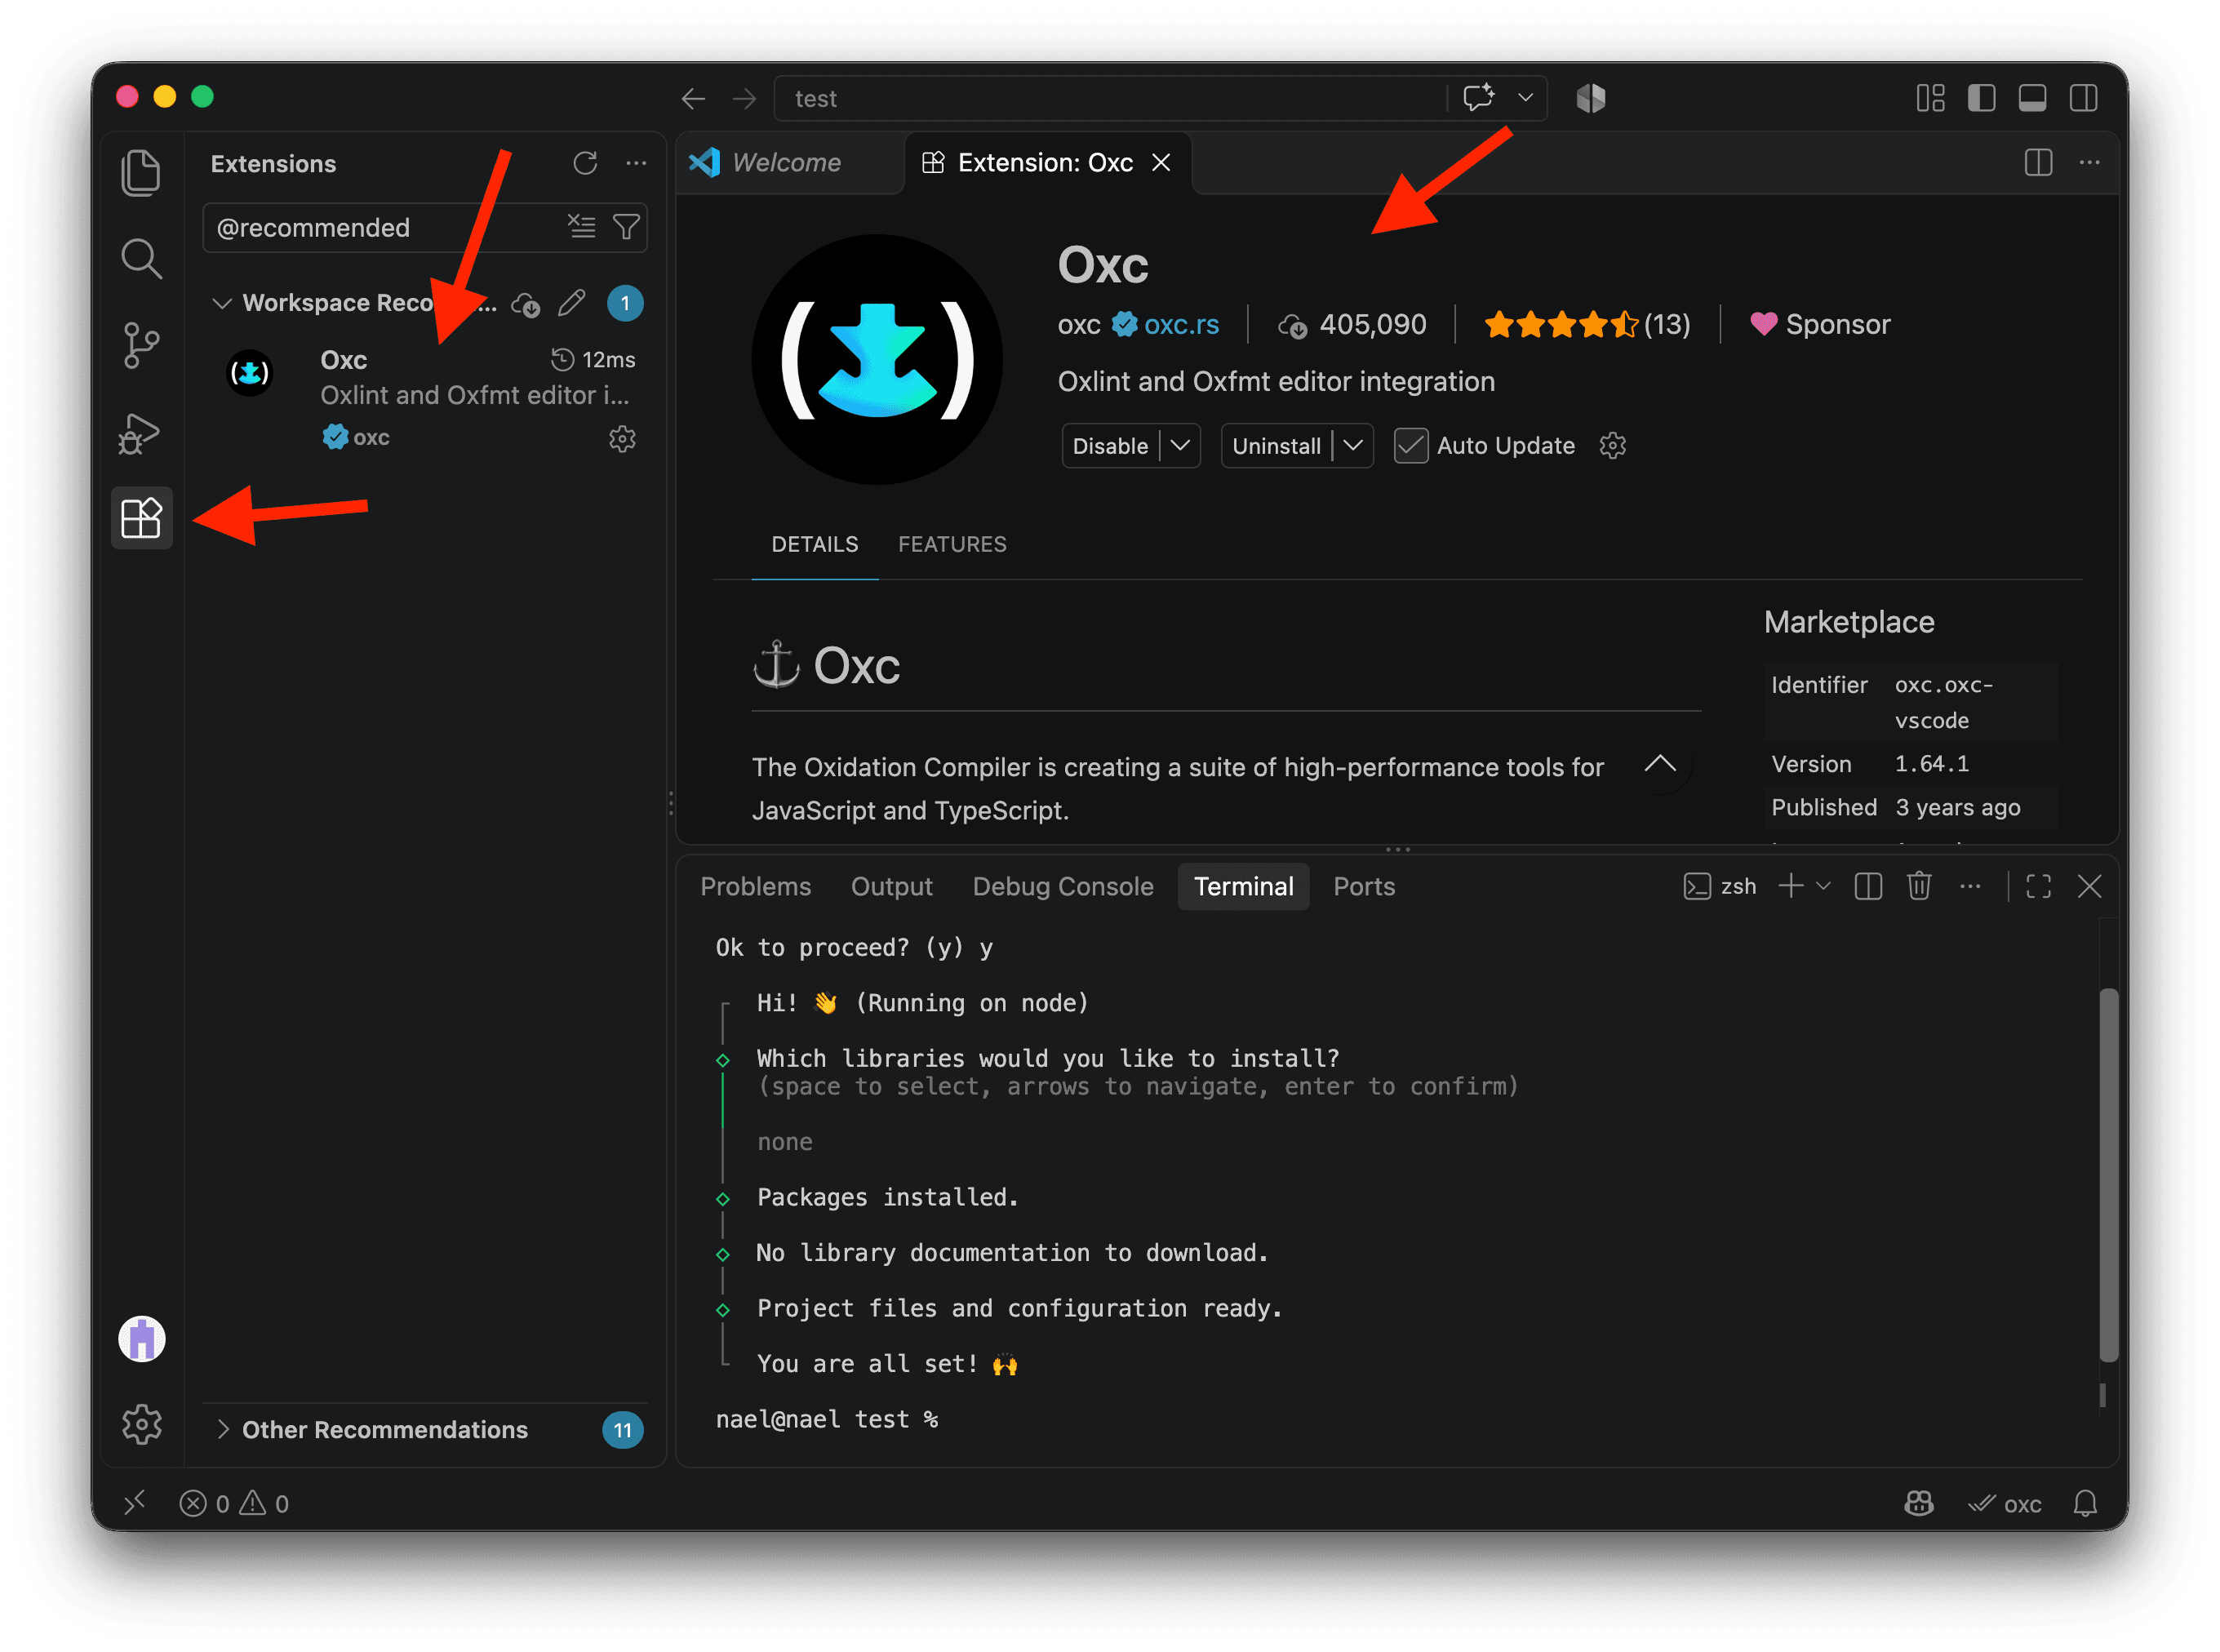
Clicking Install should open the Extensions view and show the details of the Oxc extension we’ll use in this course.
You are now ready to work! 🎉
If you’re curious about the project files, here’s a quick description of the most important ones:
README.mddescribes what the project is about and how to run the code in it. It includes the commands for running this project.AGENTS.mdcontains instructions for AI agents. We won’t use them in our lessons, but they’re there if you use this setup for another project.sda/main.tsis the main script where we’ll write our analysis. Thesdafolder also containshelpers,data, andoutputfolders for our functions, input data, and results.docscontains the installed libraries’ documentation.package.jsonlists the libraries installed in the project and useful commands we’ll run regularly.package-lock.jsonis related topackage.jsonand records the exact versions of the installed libraries. You don’t need to worry about it for now..envis where we’ll put environment variables, such as API keys..gitignoretells Git which files to leave out when tracking changes to your project or sharing it on platforms like GitHub. We’ll talk about that later.tsconfig.jsoncontains TypeScript options, already filled in with good defaults..oxfmtrc.jsoncontains formatting settings, which help keep our code neatly laid out..oxlintrc.jsoncontains settings for linting our code. Linting means checking code for mistakes and common problems..vscodeis a hidden folder containing settings for VS Code in this project, such as using Oxc to format code when you save, applying automatic fixes, and wrapping long lines.
Don’t worry if this looks like a lot. The setup tool has done the configuration for us, and you don’t need to modify these files unless you really know what you’re doing.
Now close the Extension: Oxc tab by clicking the white cross next to its title. Then click the file icon in the top-left corner to return to the Explorer and your project files.
You should now see your project files in the Explorer again, as shown below.
Run your analysis
In previous lessons and projects, type errors appeared in the editor, where you could hover over them for details. Node.js would still run the code. With this setup, linting and type errors stop the analysis before it runs. Catching these mistakes early is especially useful when complex calculations can take a long time.
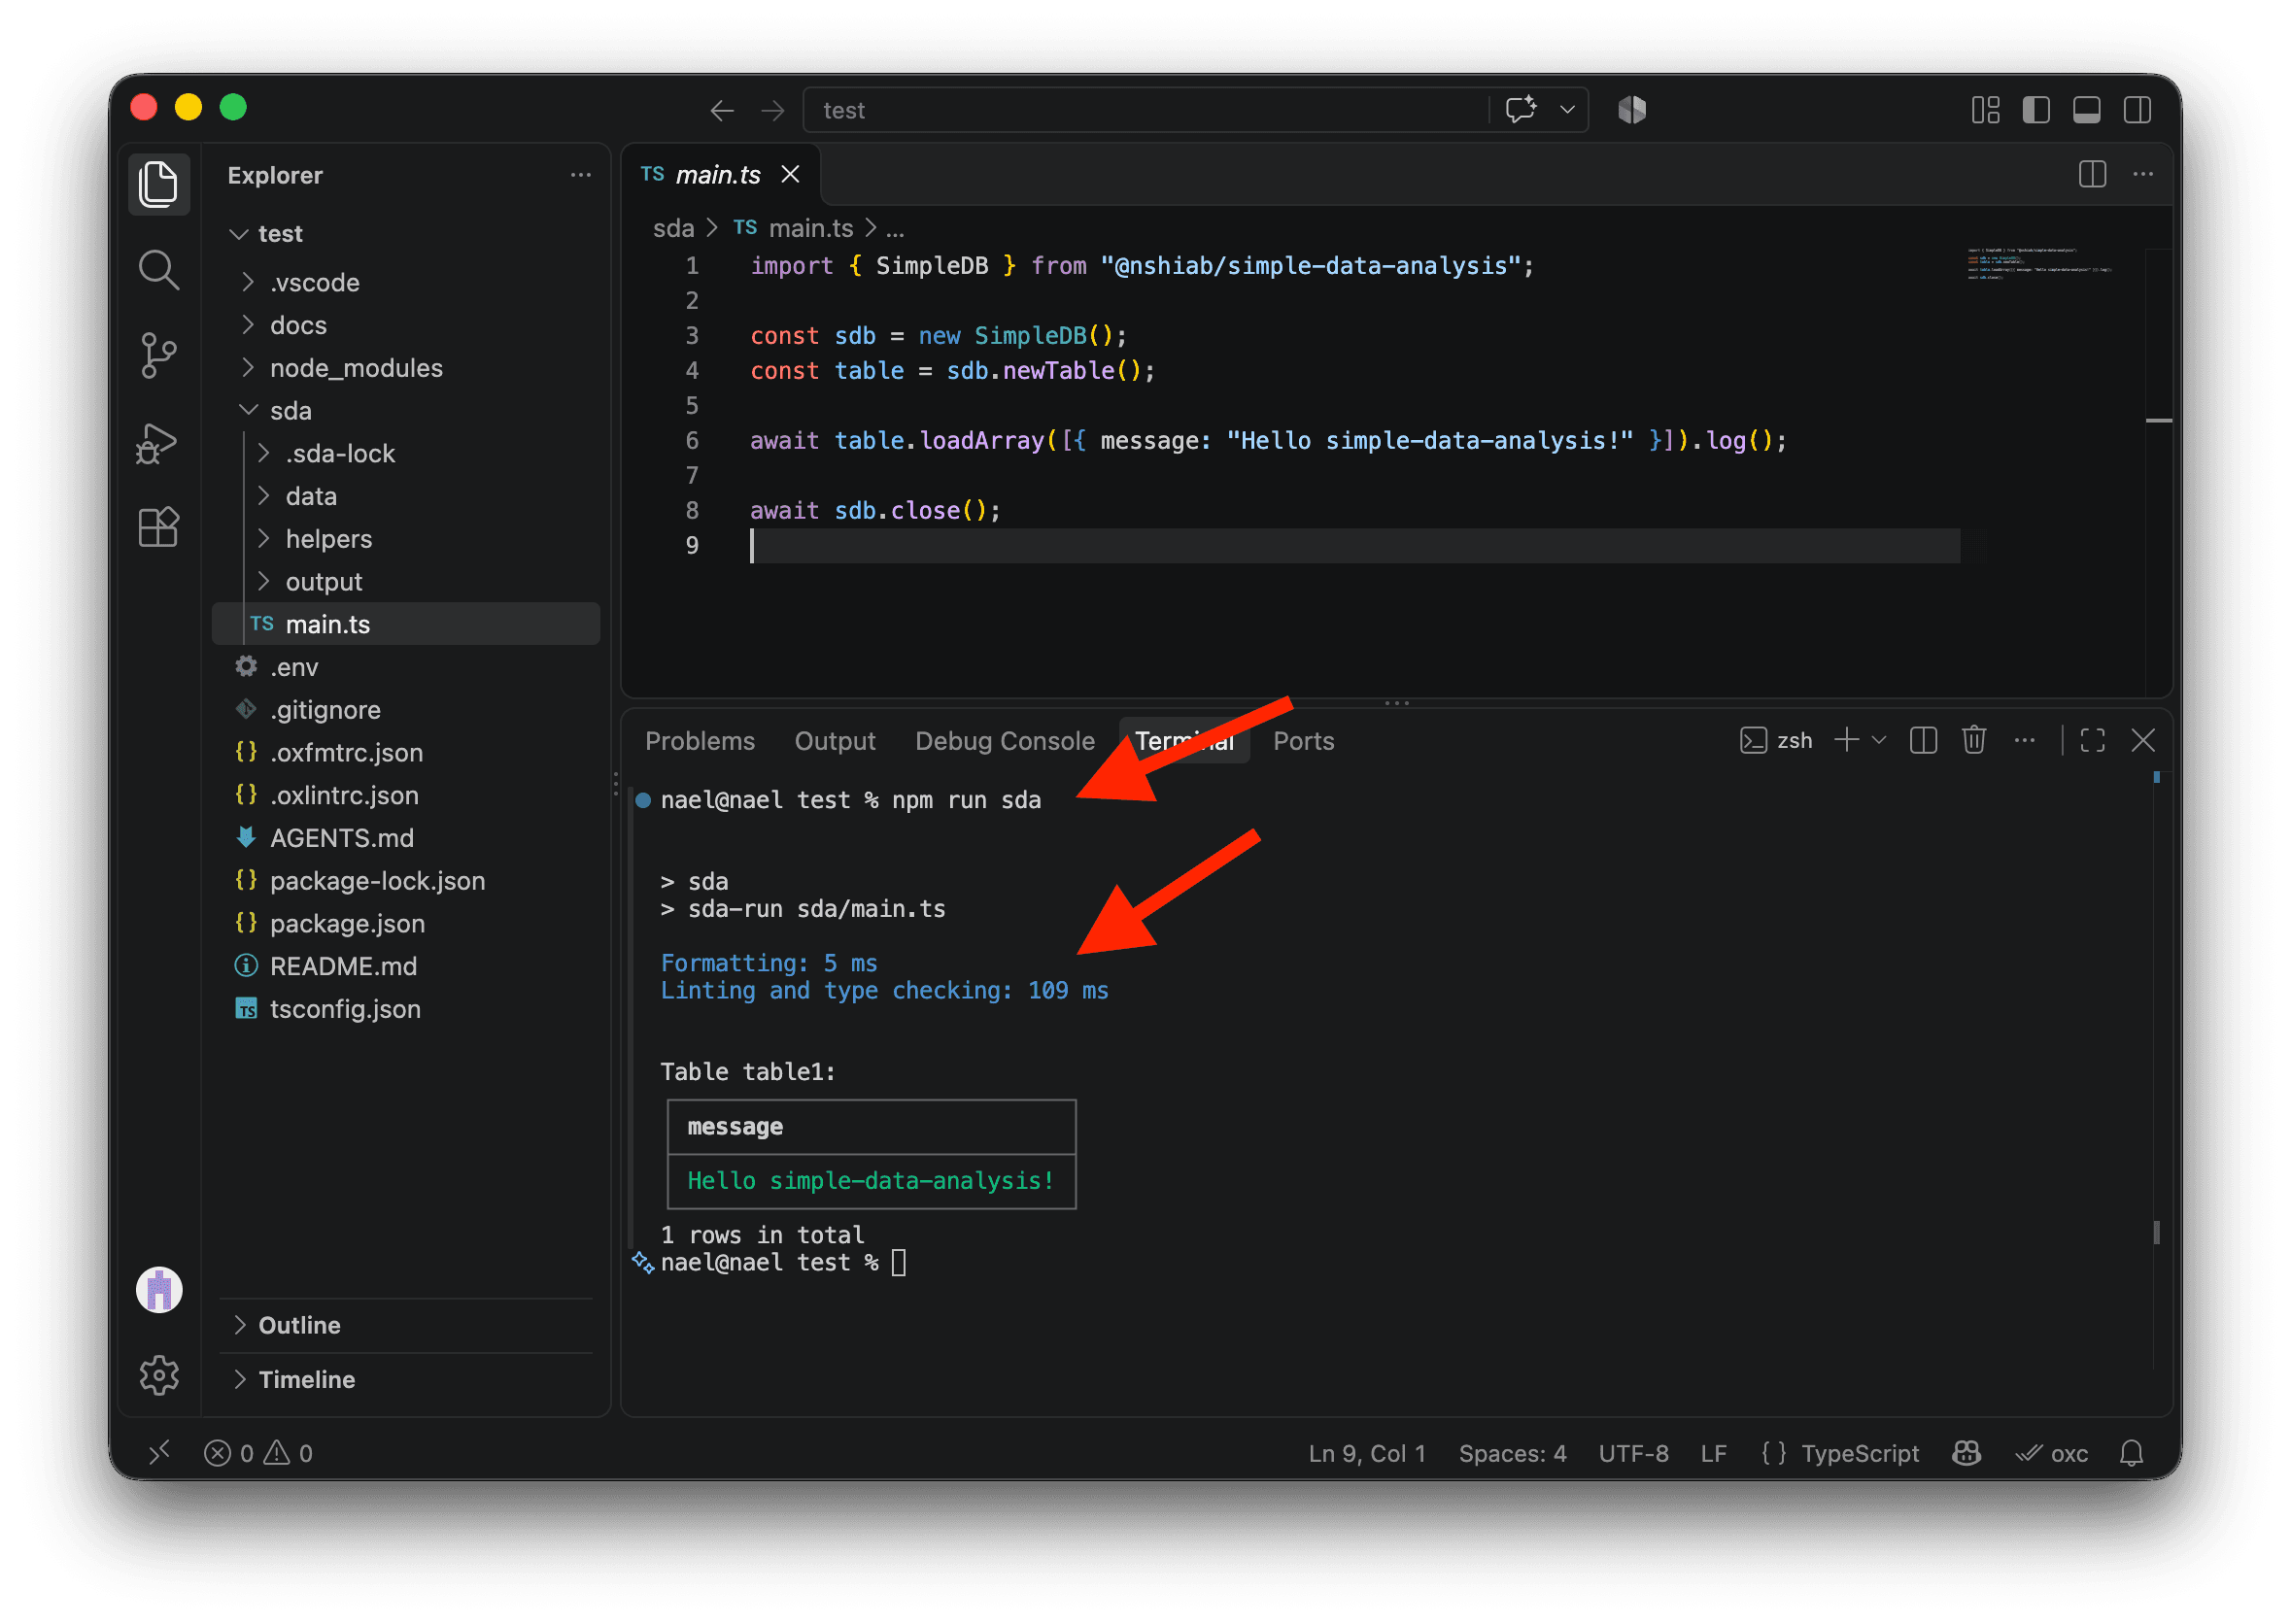
The setup tool creates sda/main.ts with a short SDA example. Open it in the Explorer. From the terminal in your project folder, run:
npm run sdaThe two blue lines in the terminal show that your code was automatically formatted, checked with linting (checks for common code problems) and type checking before the analysis ran.
For example, let’s add an error: change .log() to .logData(). This method doesn’t exist on our table.
import { SimpleDB } from "@nshiab/simple-data-analysis";

const sdb = new SimpleDB();
const table = sdb.newTable();

await table.loadArray([{ message: "Hello simple-data-analysis!" }]).logData();

await sdb.close();
Run npm run sda again. The terminal tells you exactly what the error is: logData does not exist on SimpleTable. The error still appears in your code editor, but the checks also prevent the code from running.
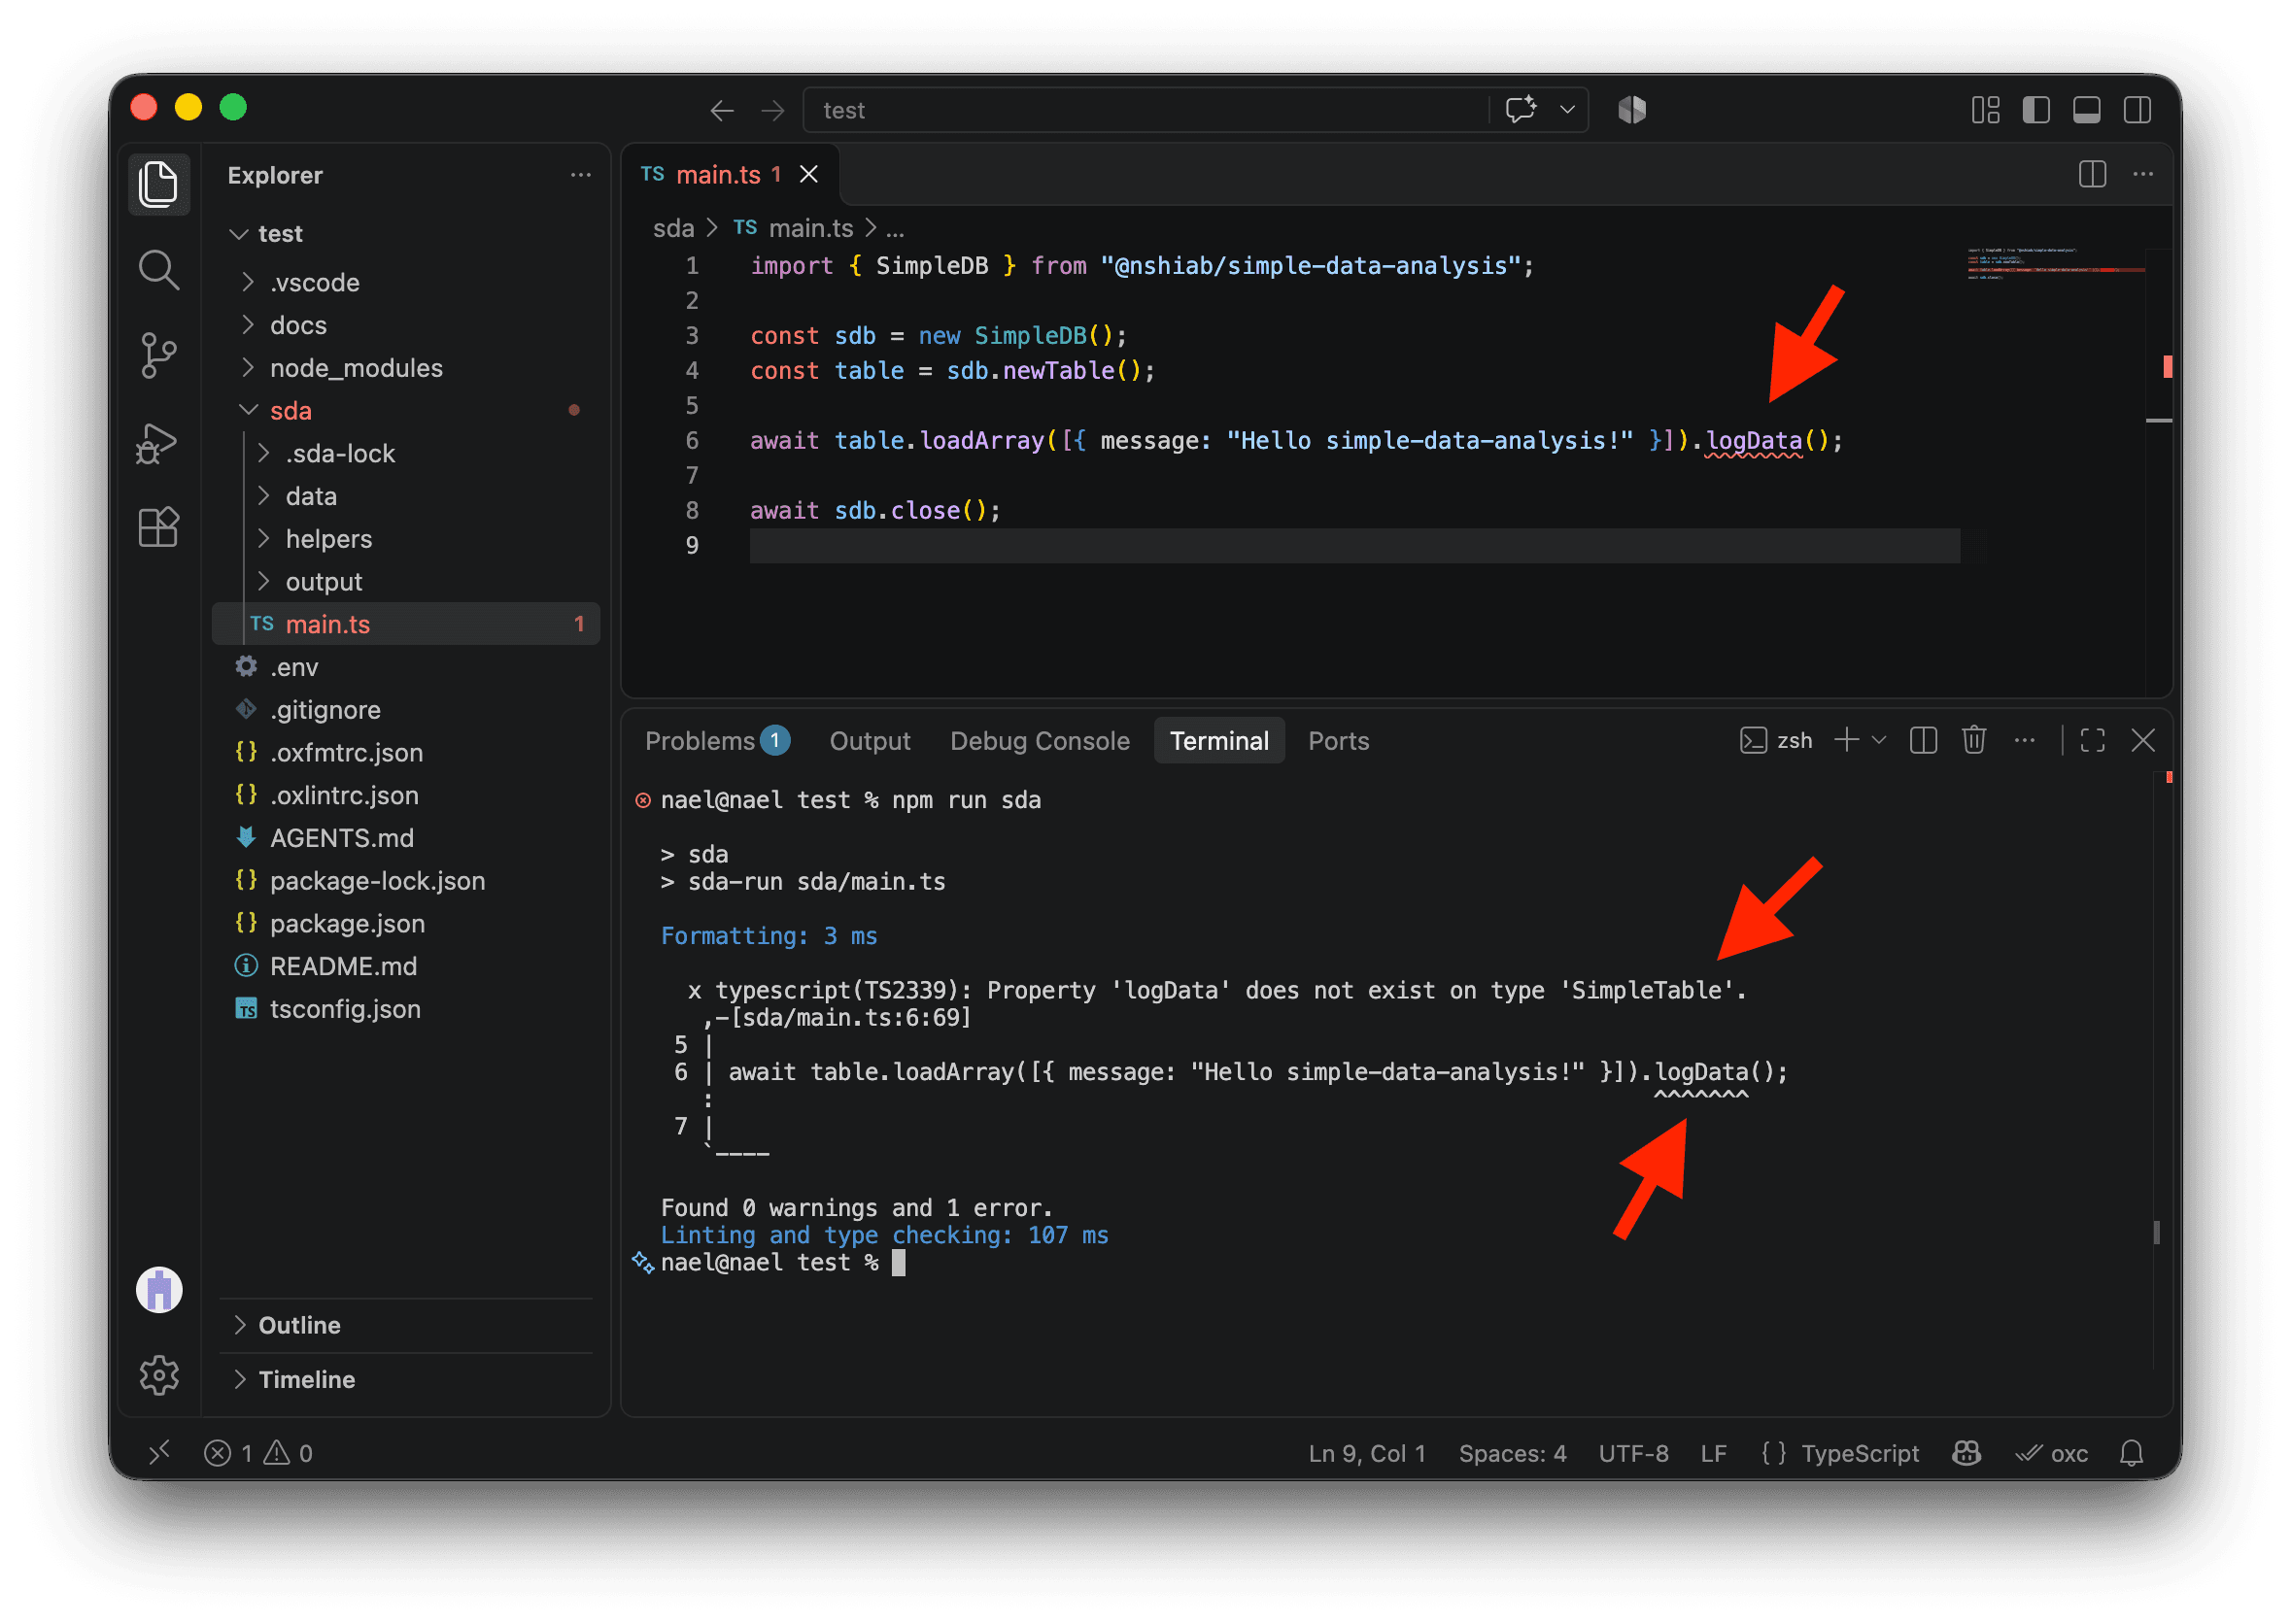
Type checking from the terminal can save a lot of time. Your editor highlights errors as you work; the terminal check covers all files in your project, which is especially useful when functions and classes are spread across many files. Imagine a 15-minute analysis failing at minute 14 because of a type error. A quick check beforehand, often taking less than a second in a small project, can catch that mistake and save the wait.
Change .logData() back to .log() before continuing.
Run in watch mode
Running your script once is useful when your analysis is finished and working well. While you’re developing it, watch mode is more convenient: every time you save, the code reruns automatically so you can see the results of your changes right away. You don’t need to return to the terminal and type npm run sda each time.
To use watch mode, add :watch to the command:
npm run sda:watchThis watches the whole sda folder and the .env file, formats and checks the code, then reruns it when those files change. It ignores changes to sda/output so saving results doesn’t start another run.
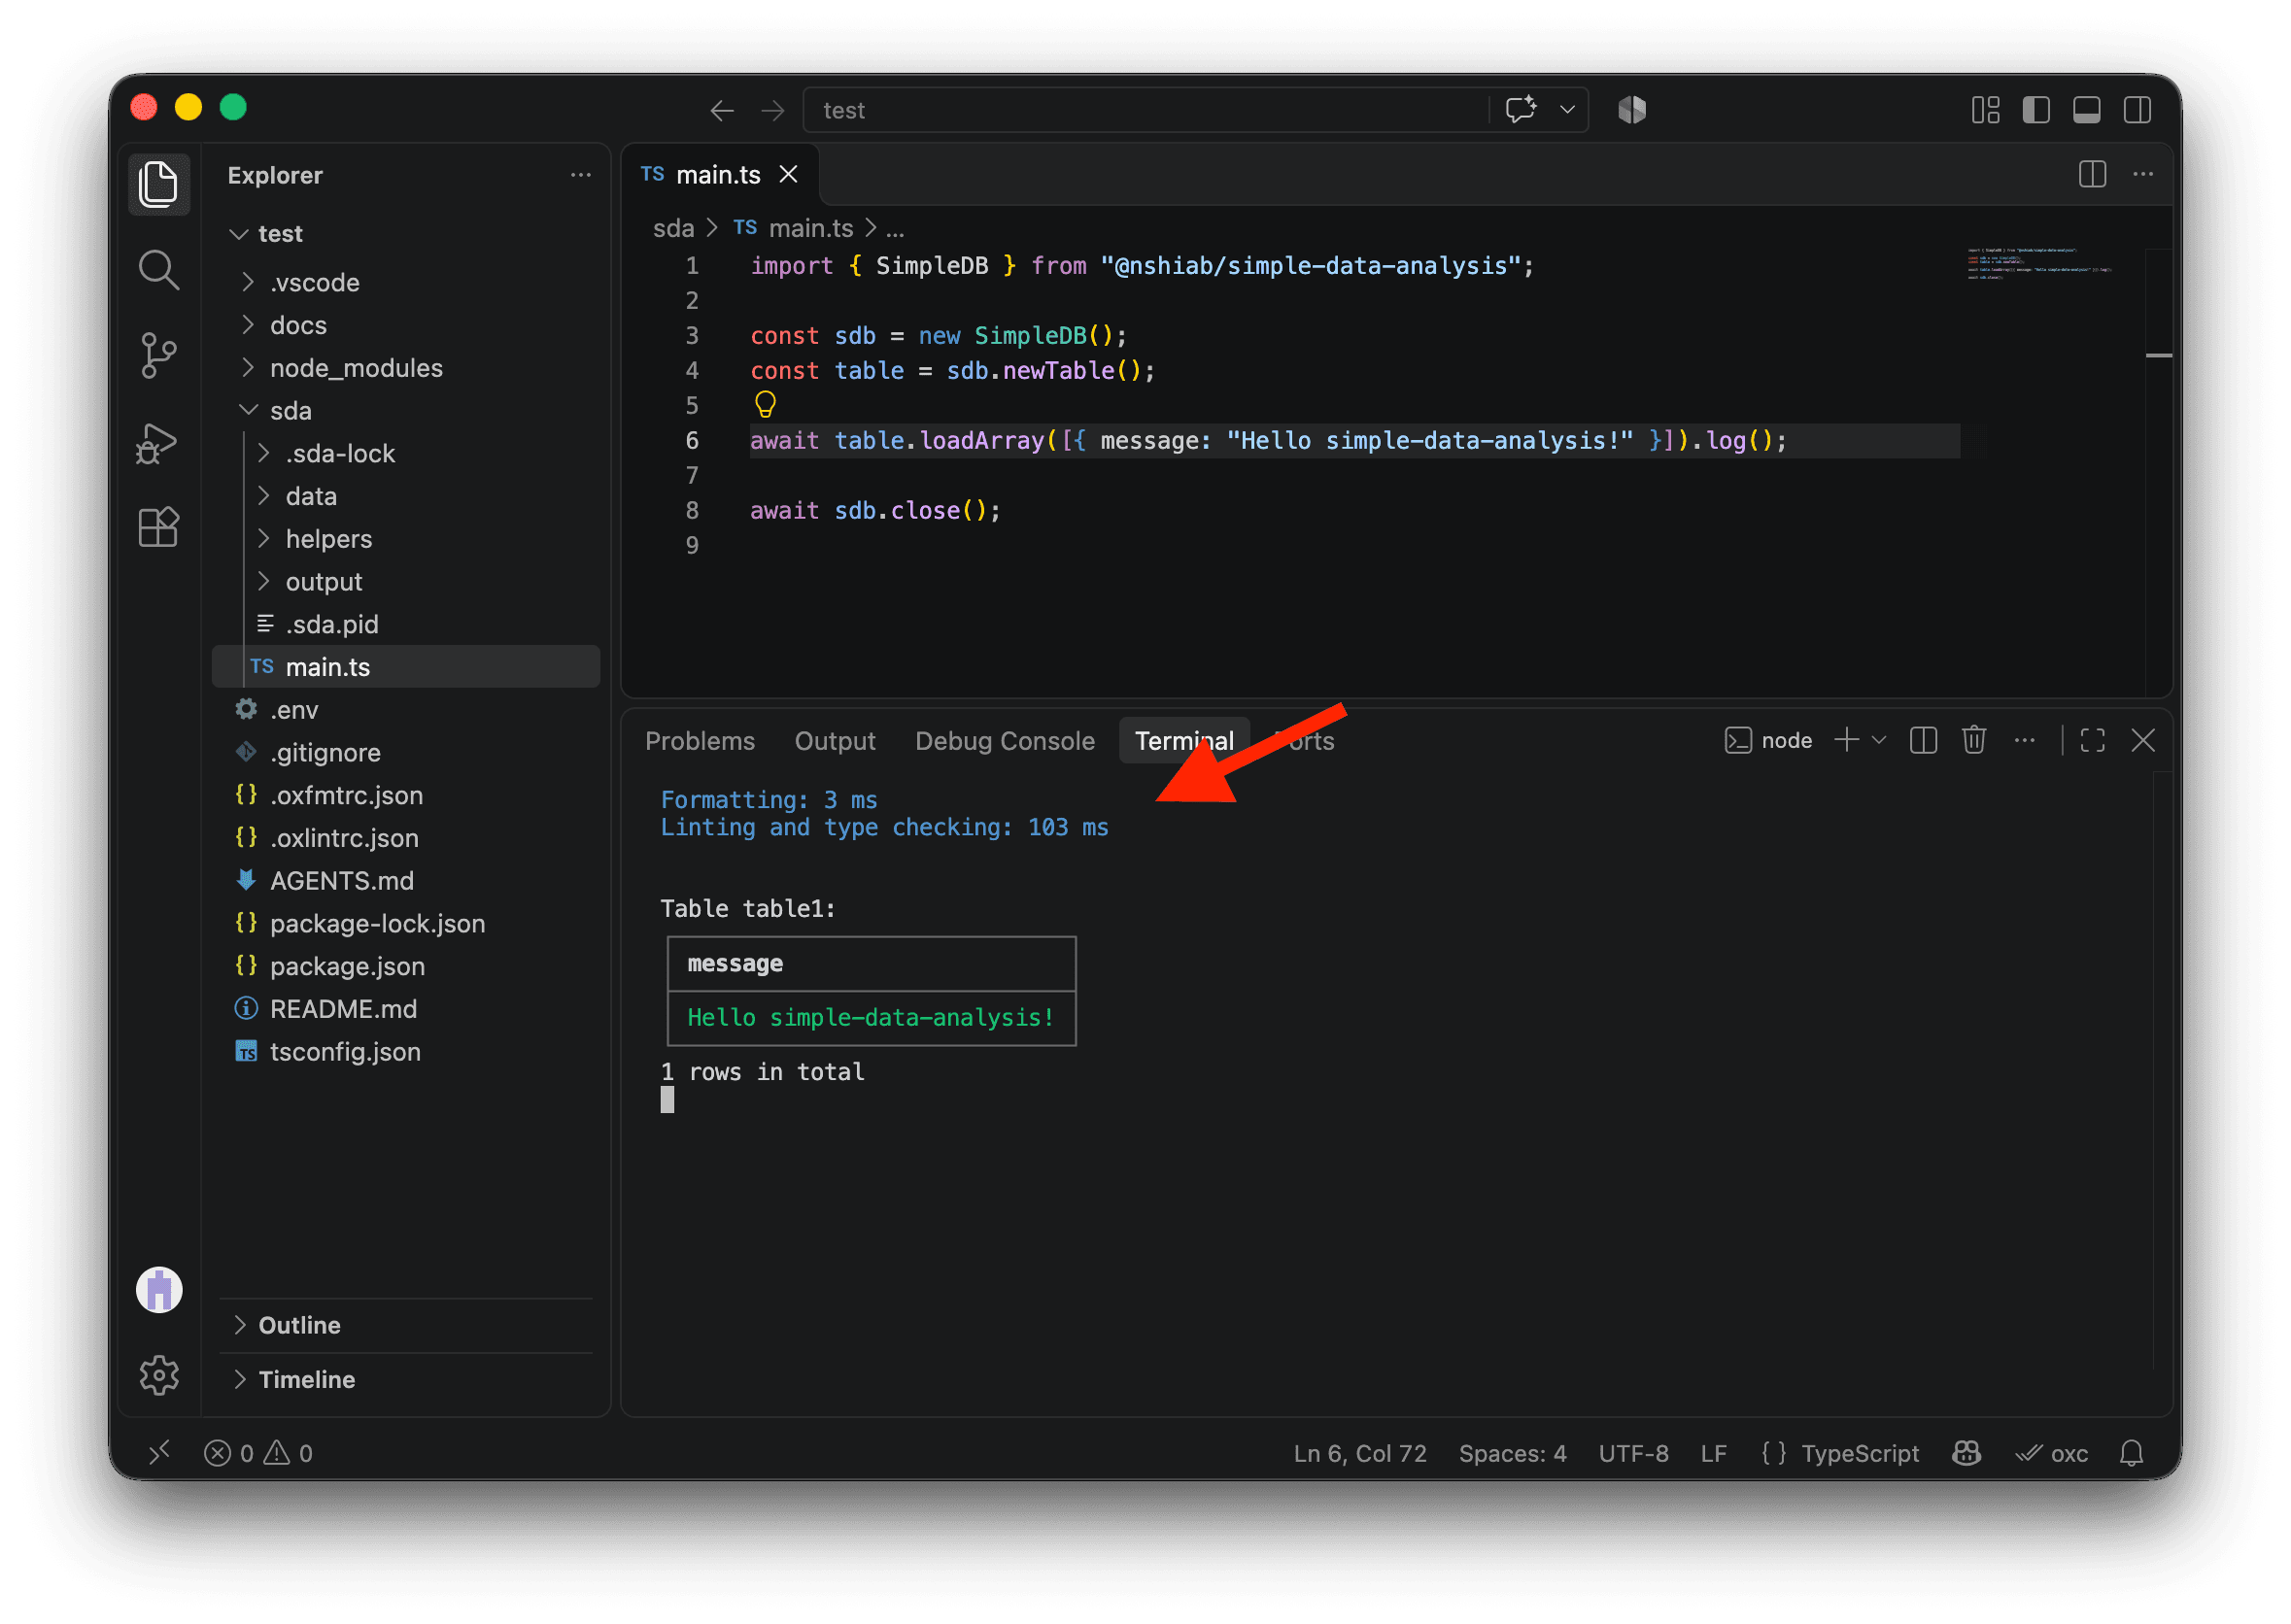
Watch mode also formats and type-checks your code every time you save, so you’ll know right away if a check finds a problem.
Change the message on line 6 from Hello simple-data-analysis! to Let's have data fun, then save the file:
import { SimpleDB } from "@nshiab/simple-data-analysis";

const sdb = new SimpleDB();
const table = sdb.newTable();

await table.loadArray([{ message: "Let's have data fun" }]).log();

await sdb.close();
The code reruns automatically, and the terminal displays your new message.
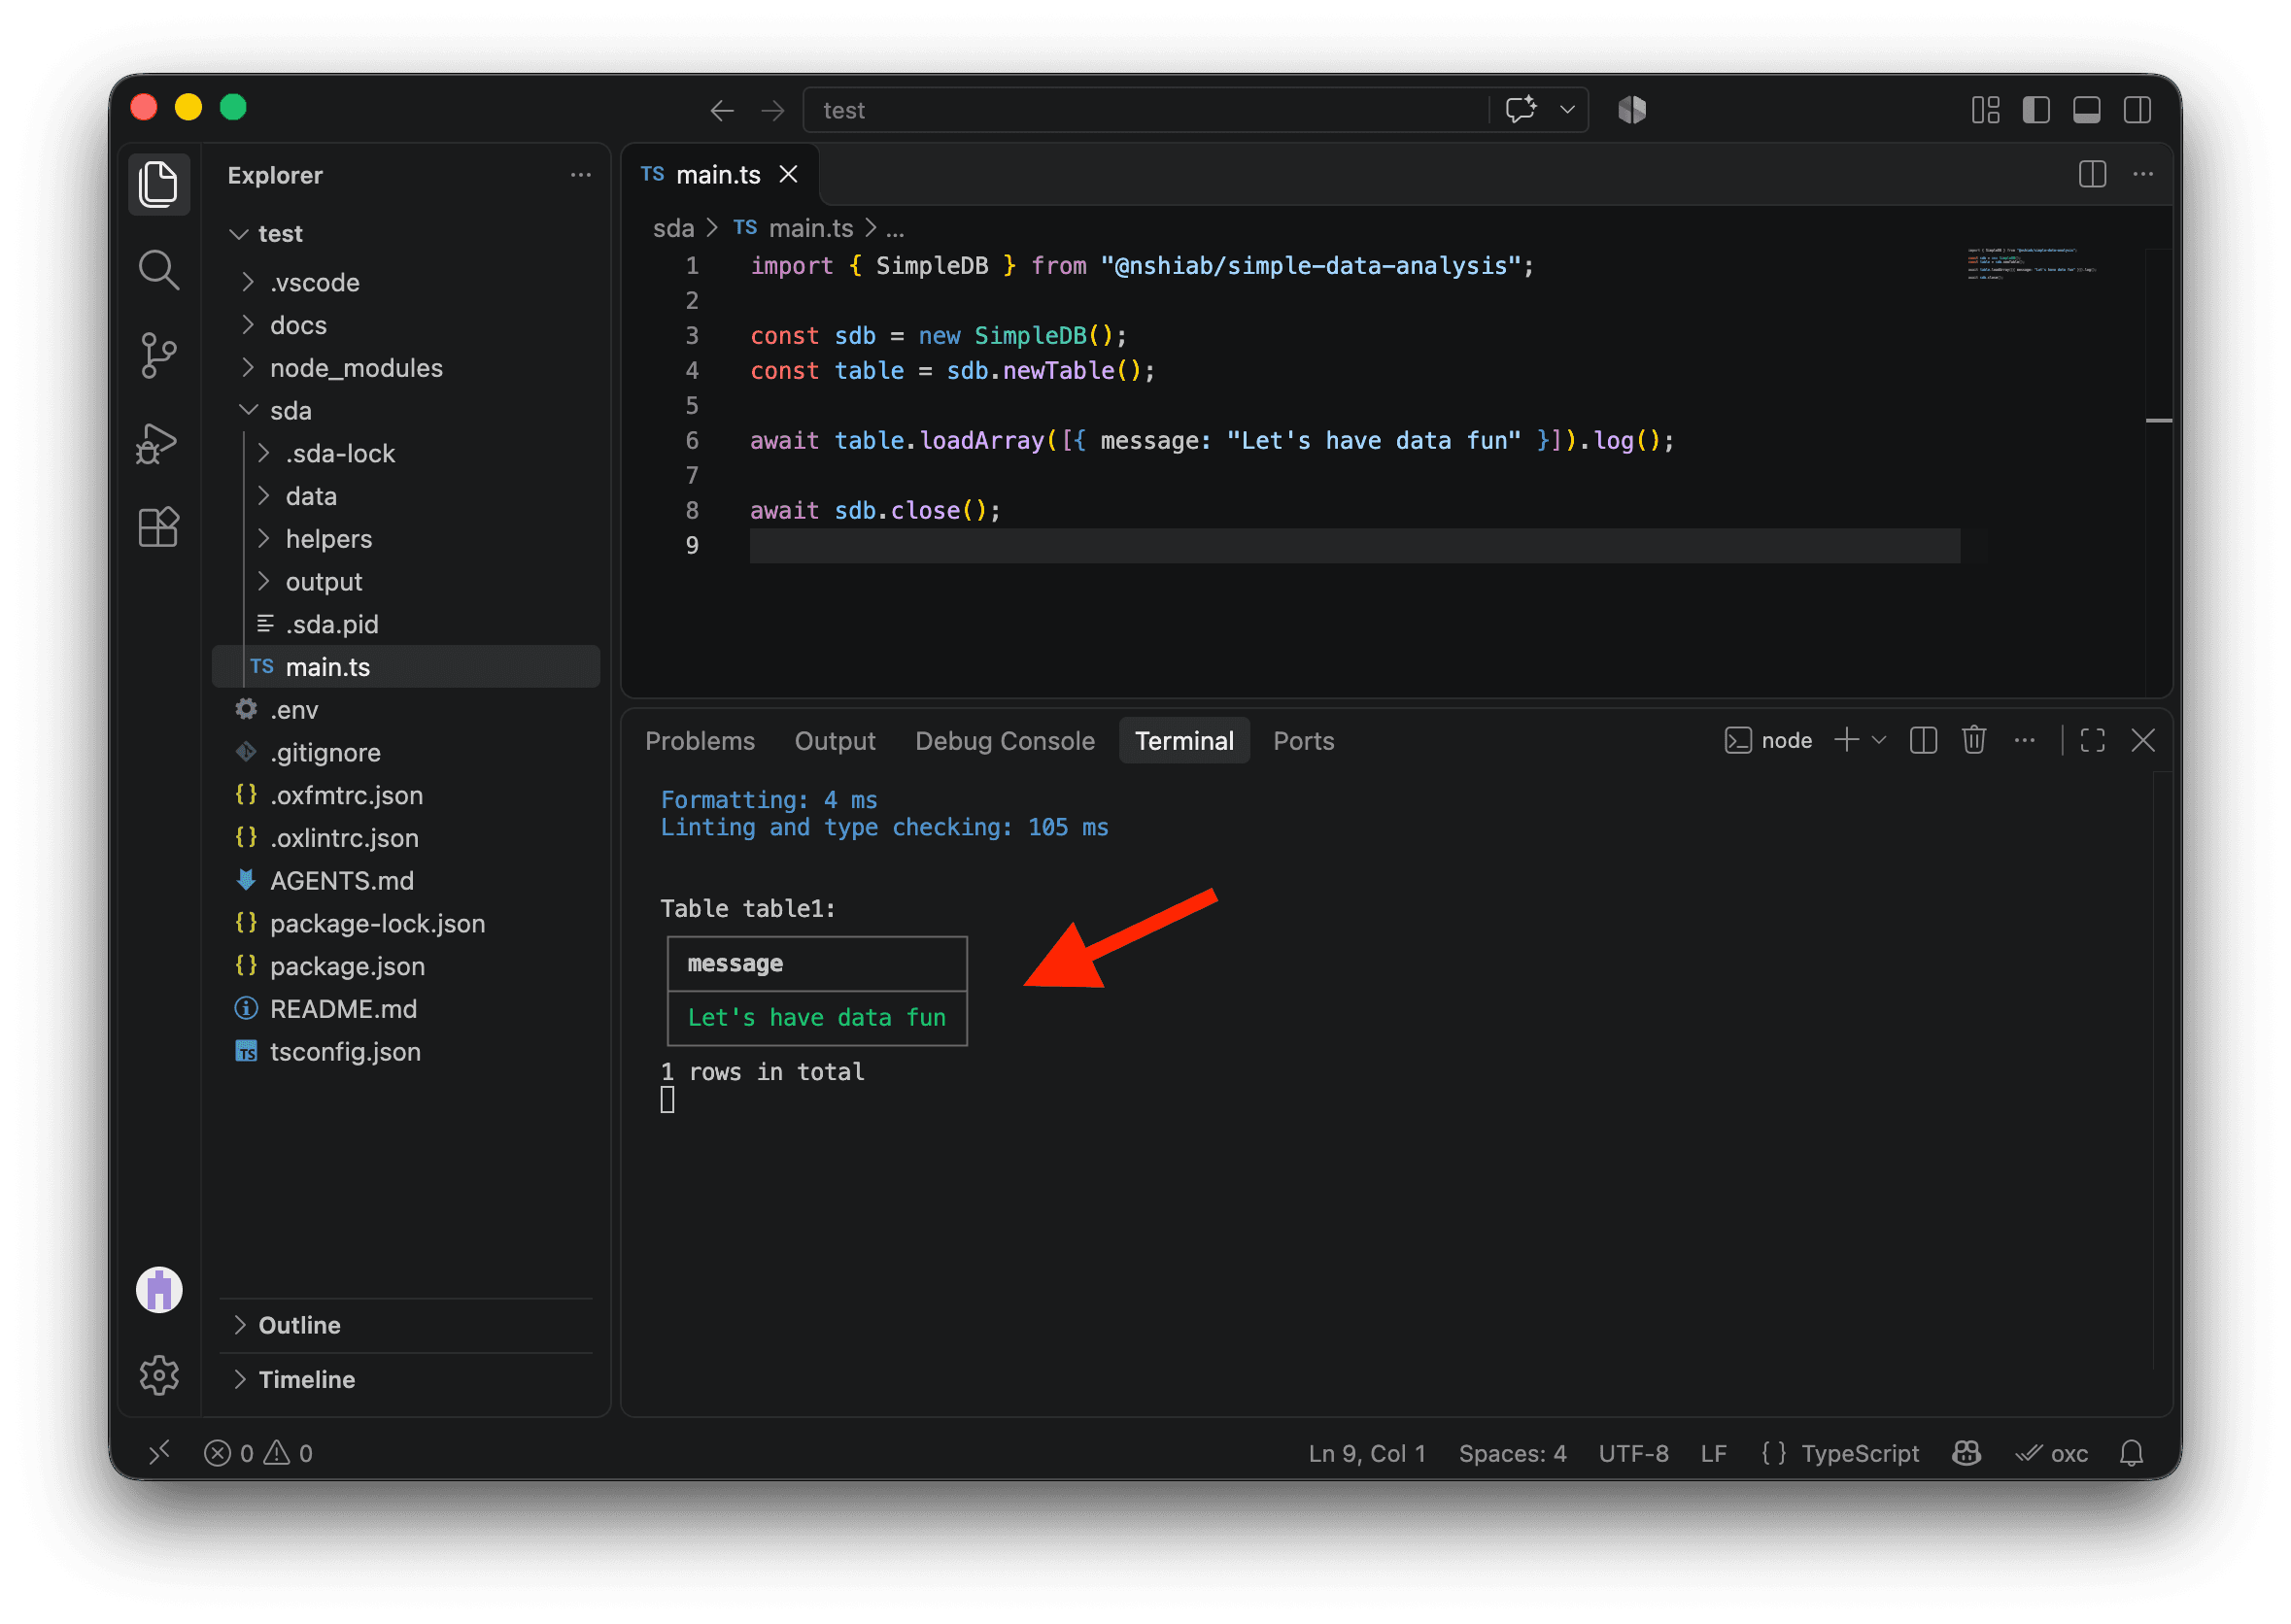
To stop watching, click in the terminal and press Control + C on Mac or Windows.
Checking without running the code
Sometimes you want to check your code without running an analysis that could take a long time. This command formats your files, checks lint rules and TypeScript types, and applies automatic fixes:
npm run fix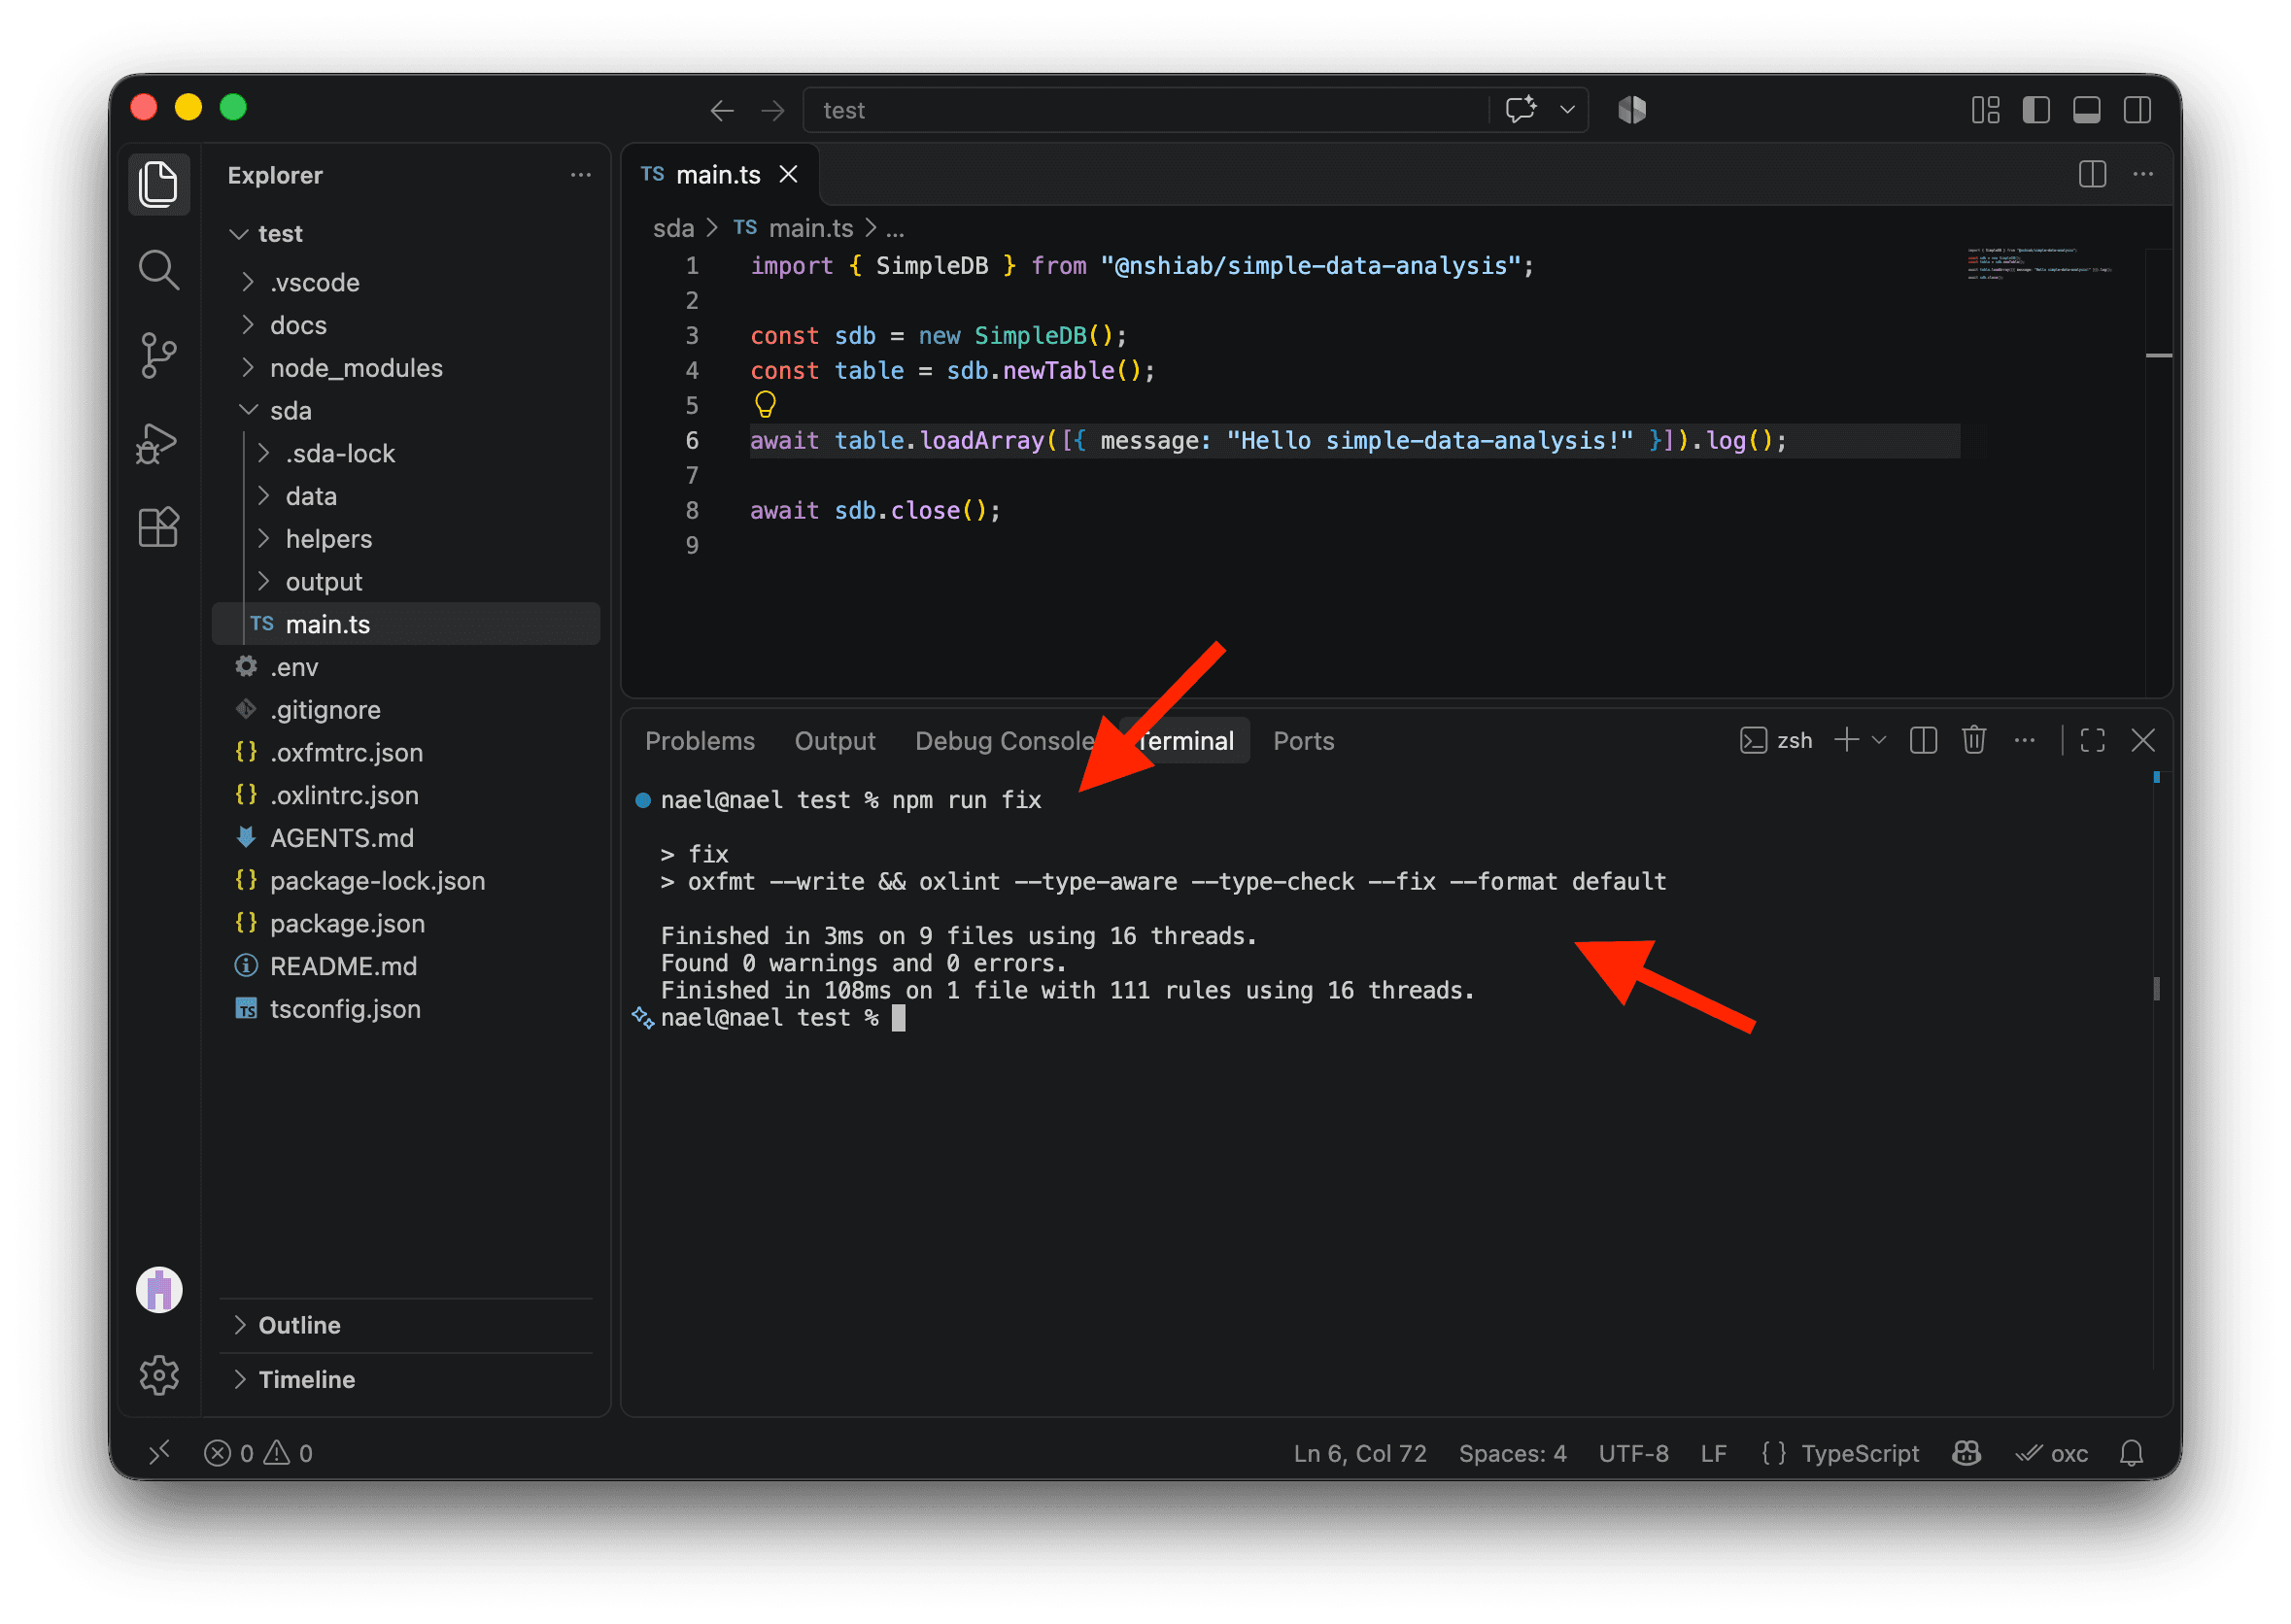
Some problems will still need a fix from you. Read the messages, make the changes, and run the checks again.
The libraries and tools you use may create temporary files in your project folder. To remove the temporary files and folders targeted by the project’s cleanup command, run:
npm run cleanIf there’s nothing to remove, nothing happens. In future lessons, we’ll cache the results of computations or API calls. Sometimes you’ll want to clear those cached results and start fresh; this command will come in handy.
You also have a command that checks formatting, lint rules, and types without modifying your files:
npm run all-testsIt is already included so you can extend it with automated tests later, for example to verify specific calculations. We’ll cover tests in later lessons.
Conclusion
Setting up a project can be a pain, and it’s easy to forget an important setting. With @nshiab/setup-data-project, you can get started much faster and jump straight into the fun part.
Wondering why we installed the Oxc extension? Oxc’s tools help format and check our code, through the extension in the editor and the commands in the terminal. We’ll discover more useful extensions in later lessons and projects.
Now it’s time to have fun! Head to the Tabular data lesson. You can keep your current project setup to work through it.