Commands with npm
Last updated on
With npm, you can define shortcuts to avoid rewriting long commands in the terminal. These shortcuts are called scripts, and we define them in package.json.
I assume you’ve completed Chapter 1 and all previous lessons in Chapter 2 before diving into this one. In particular, make sure you’ve followed the Setup lesson.
Setup
Create a new, empty folder on your computer, open it with VS Code, and create a file named main.ts inside it.
Use this code from the Fetching data lesson in main.ts and save the file. It fetches the temperature data, parses the JSON, and logs it in the terminal:
const response = await fetch(
  "https://raw.githubusercontent.com/nshiab/data-fetch-lesson/refs/heads/main/temp.json",
);

const data = await response.json();

console.log(data);You’ll see two errors about await in your code editor. That’s okay for now: we’ll fix them in this lesson.
Create npm scripts
So far, we’ve used node --watch main.ts to execute the code in main.ts and run it again whenever we save a change. This is a command we give directly to Node.js. But we can also run our code through npm!
In the previous lesson, we used npm to install libraries. Installing them created a package.json file listing our dependencies. But this file can do more than keep that list: we can also add scripts, which give names to commands we want to run.
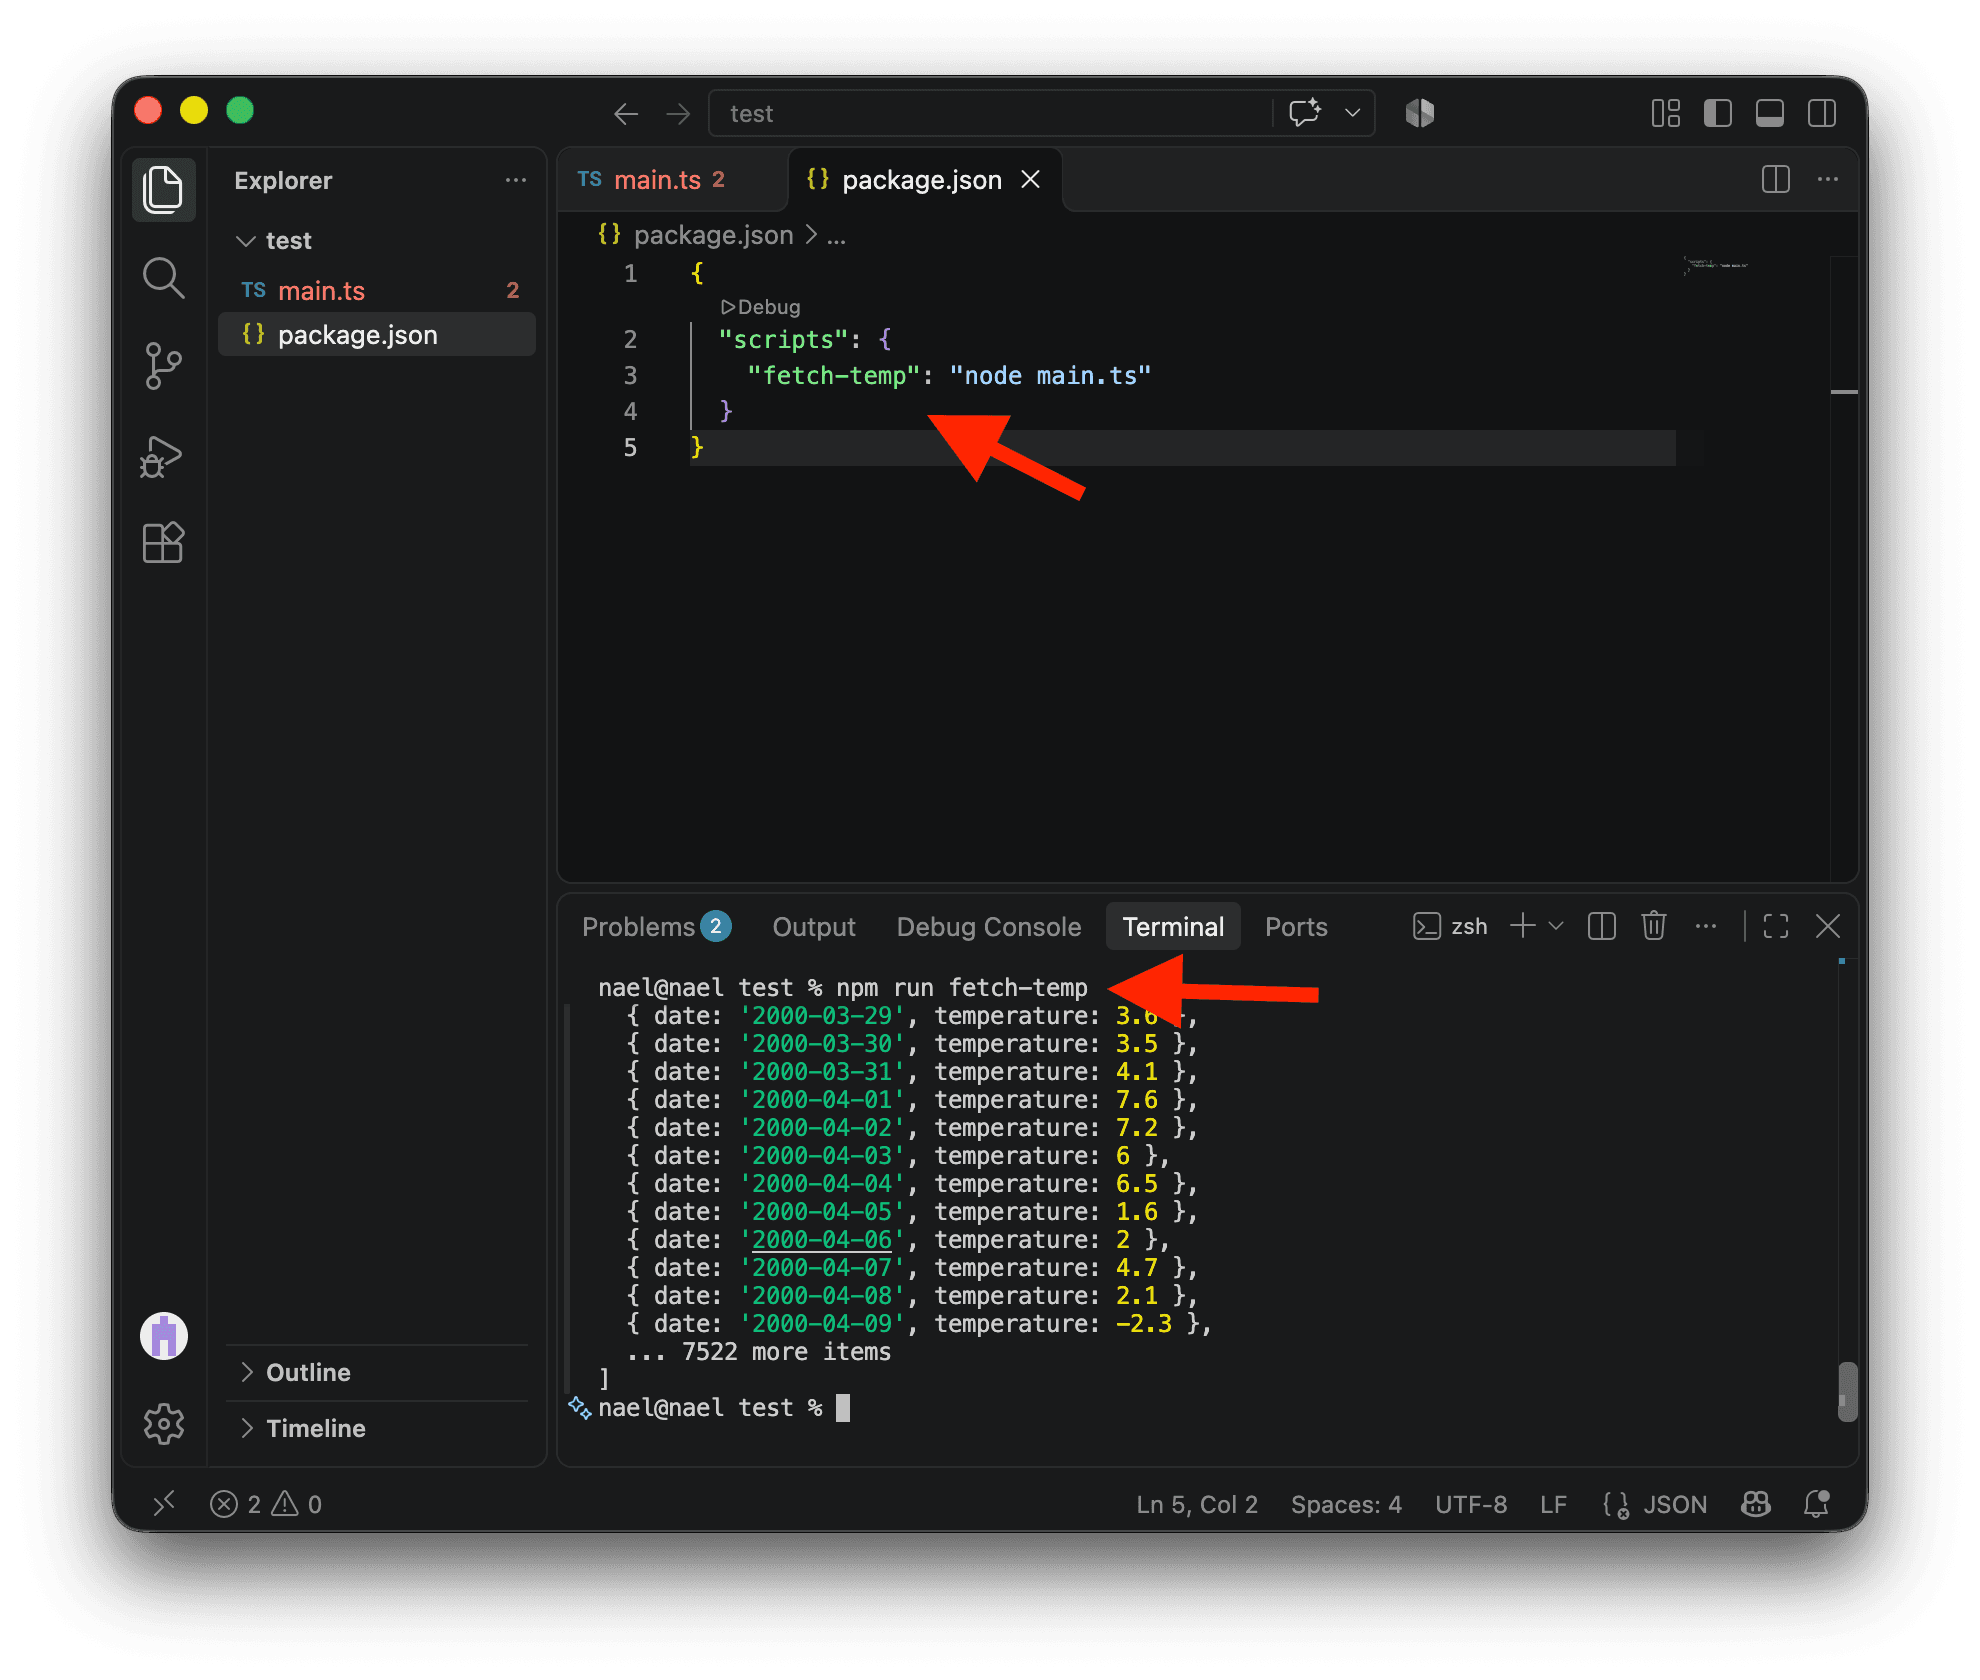
Let’s create a command that fetches temperature data and call it fetch-temp. Create a new file named package.json in your project folder and add this:
{
  "scripts": {
    "fetch-temp": "node main.ts"
  }
}
Inside scripts, fetch-temp is the name we chose, and node main.ts is the command it will run. It runs our code just once, without watching for changes.
Now, run this command in your terminal:
npm run fetch-tempYou’ll see the code in main.ts being executed. You’ve created another way to run your code, with a custom name that describes what it does!
You can define as many scripts as you need. Give them clear names so you remember what each one does. For example, a project might use npm run clean to clean the raw data and npm run visualize to create visualizations from the cleaned data. Keeping these steps separate means you can update your visualizations without cleaning the data again. Run npm run without a script name to list the available ones.
Configuring TypeScript
Your package.json isn’t just for listing dependencies and scripts: it also contains configuration settings for your project. For example, right now your code editor shows two errors about await. Let’s fix them by telling Node.js and TypeScript how to understand our code.
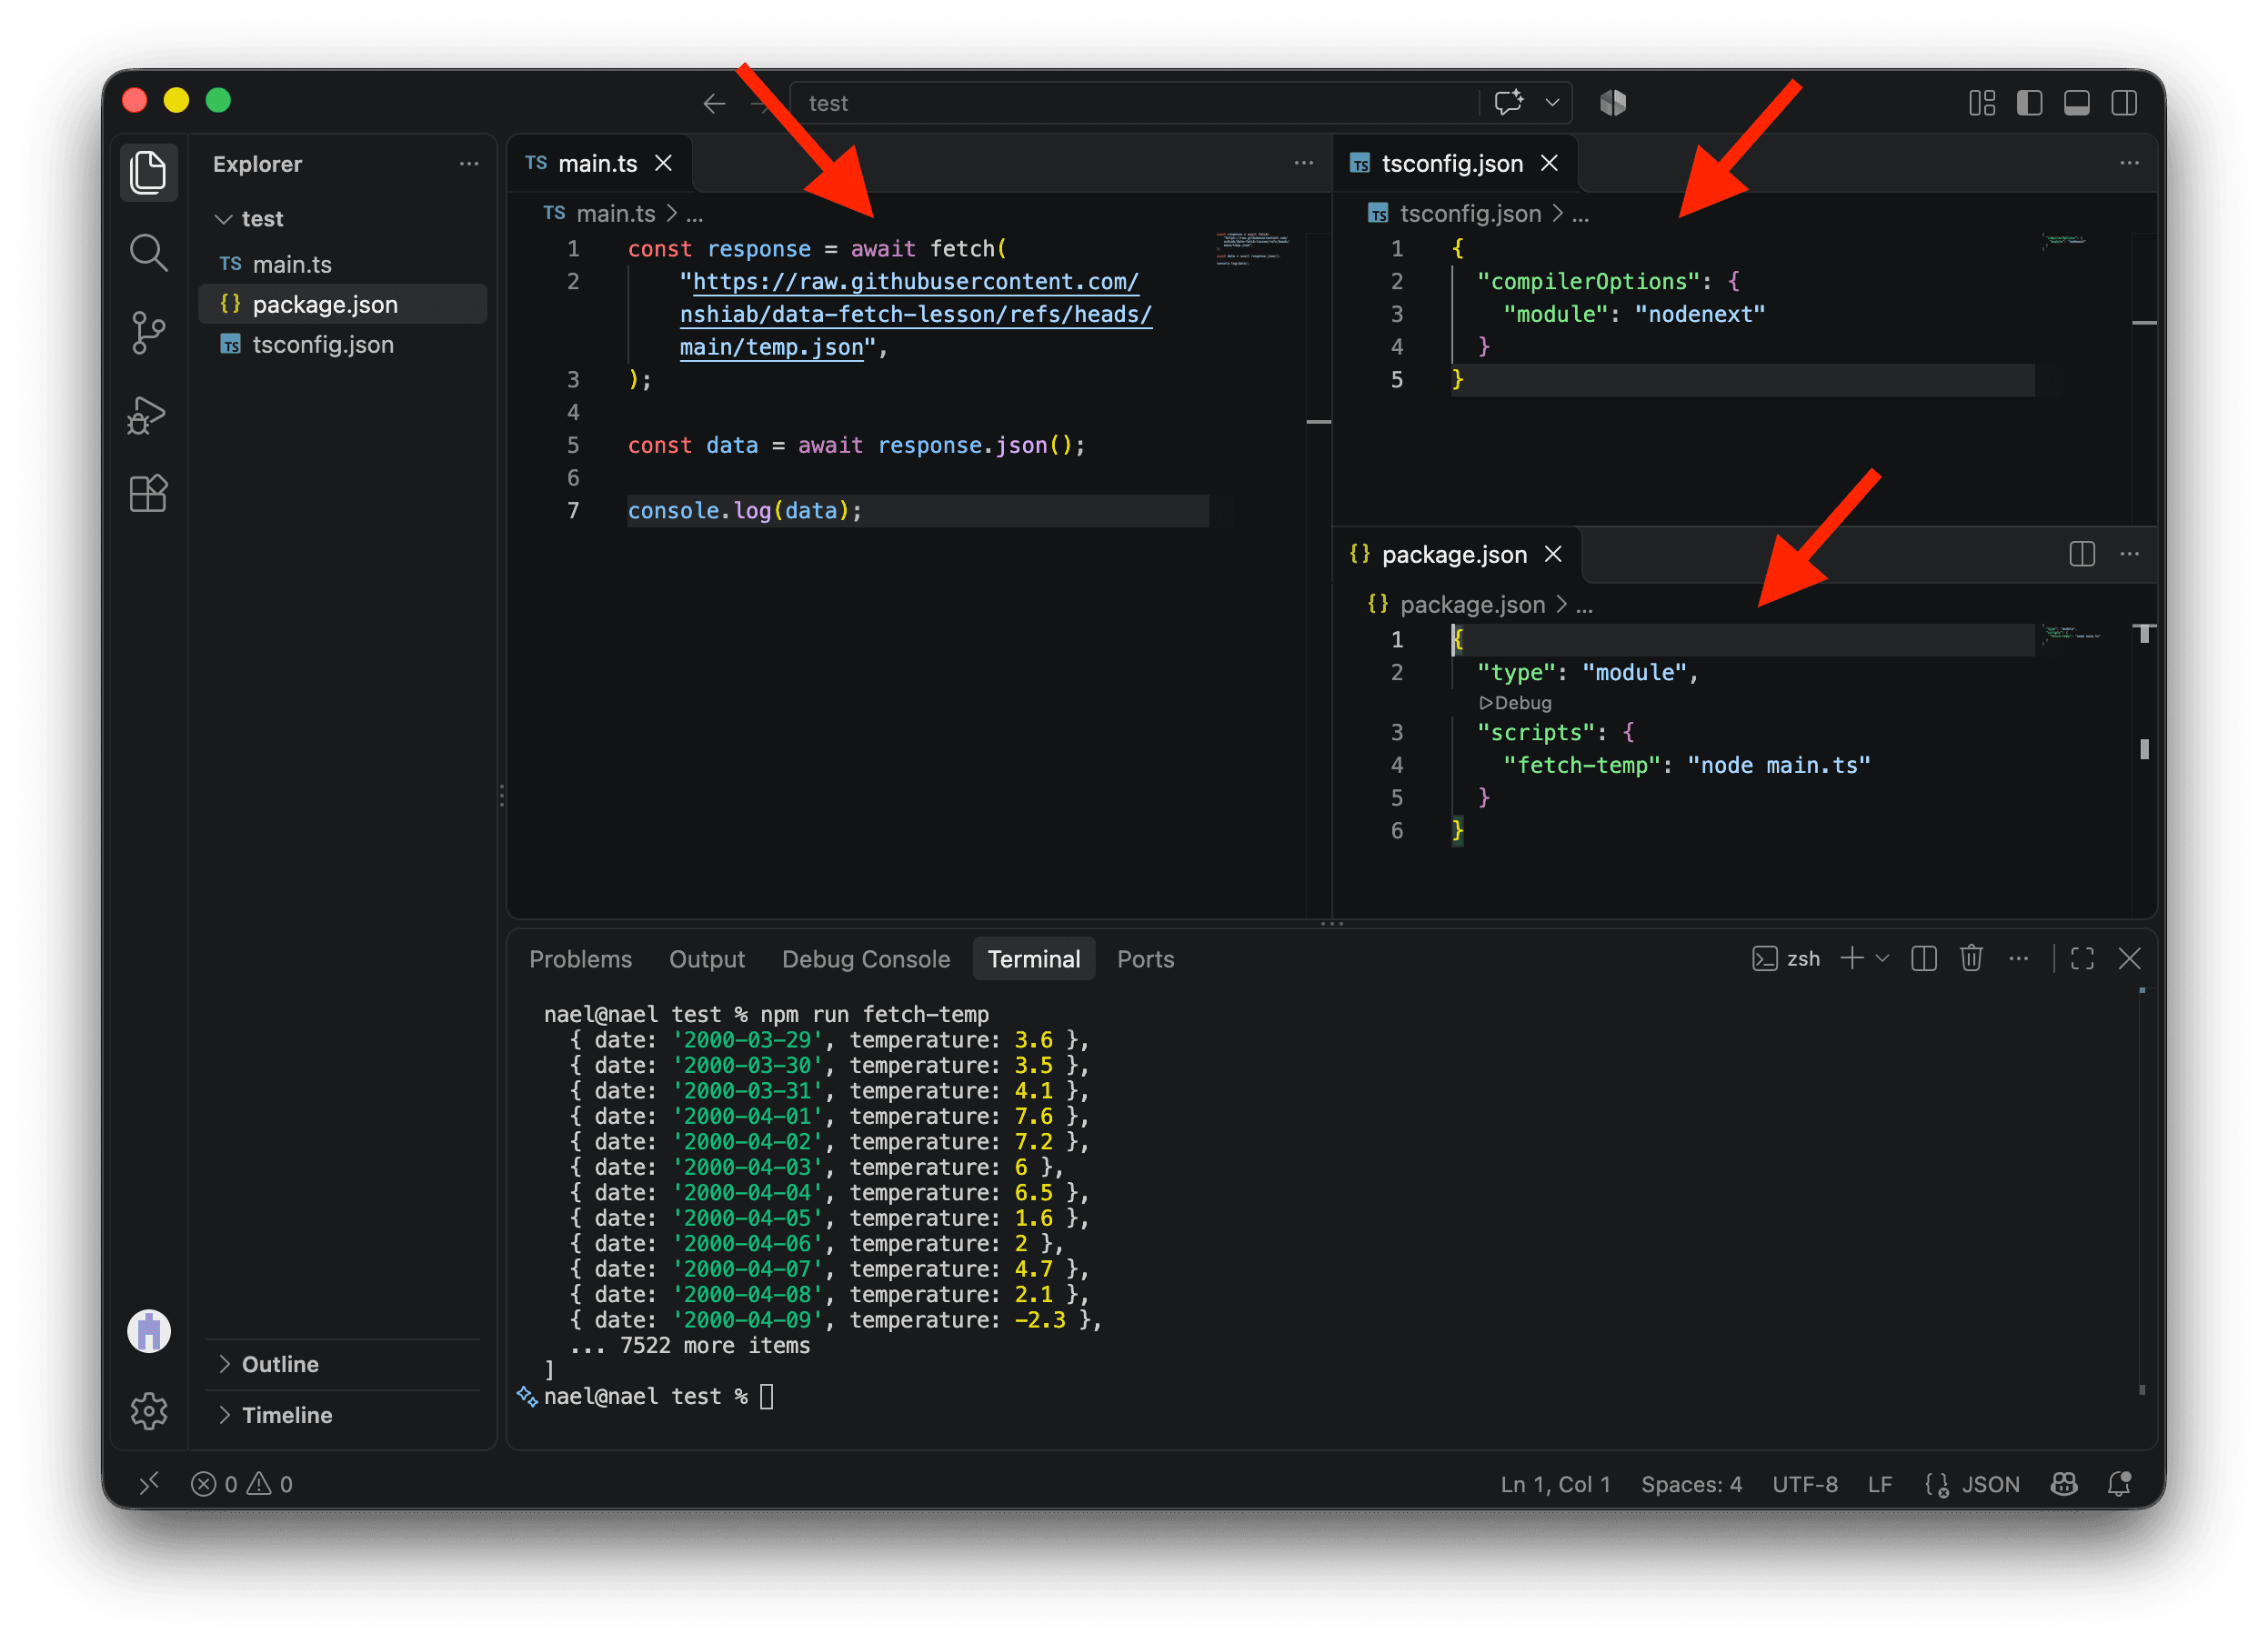
First, add "type": "module" to package.json. This tells Node.js that our project uses a modern way of organizing code, called ES modules:
{
  "type": "module",
  "scripts": {
    "fetch-temp": "node main.ts"
  }
}
Next, create a file named tsconfig.json in the same folder as package.json and main.ts. This configuration file tells TypeScript, which VS Code uses to check our code, how to interpret the project. Add this:
{
  "compilerOptions": {
    "module": "nodenext"
  }
}
The "module": "nodenext" setting tells TypeScript to follow Node.js’s rules, including the "type": "module" setting in package.json. Together, these settings allow us to use await directly in our file, outside a function.
Save both files. The two errors about await should disappear, without changing main.ts!
Don’t worry: you’ll rarely need to tweak these settings. In Chapter 3, Data analysis with SDA, we’ll use a library to set all of this up for us automatically.
Conclusion
Scripts are useful in all kinds of projects, whether you’re running code, scraping the web, analyzing data, or building and publishing a website. We’ll use them in the next chapter, where a setup tool will prepare the commands and libraries for our data analysis projects.
Congratulations, you’ve reached the end of Chapter 2! Read the chapter conclusion for project ideas and other ways to put everything you’ve learned into practice. 🥳